Once activated, the theme adds a Configuration page to the WordPress admin. Most configuration options can be set on this page. Per-post options can be set in the Invisible Options box of the Post admin page.
If installing the theme on an existing site, please be aware the theme does some behind the scenes changes on install, such as disabling Comments, Trackbacks and Tags, disabling the File Editor, deactivating Advanced Custom Fields (incompatible as the theme already bundles the plugin), removing the default Tagline, setting permalinks to %postname% and changing media sizes to our recommended values. You can use a plugin such as Simple Image Sizes to quickly regenerate sizes for any existing images.
Content Types
Invisible makes use of the default Posts and Pages content types. Your work lives under Posts, while text pages (About, Contact, etc.) live under Pages.
You can group work in different sections/portfolios using Categories.
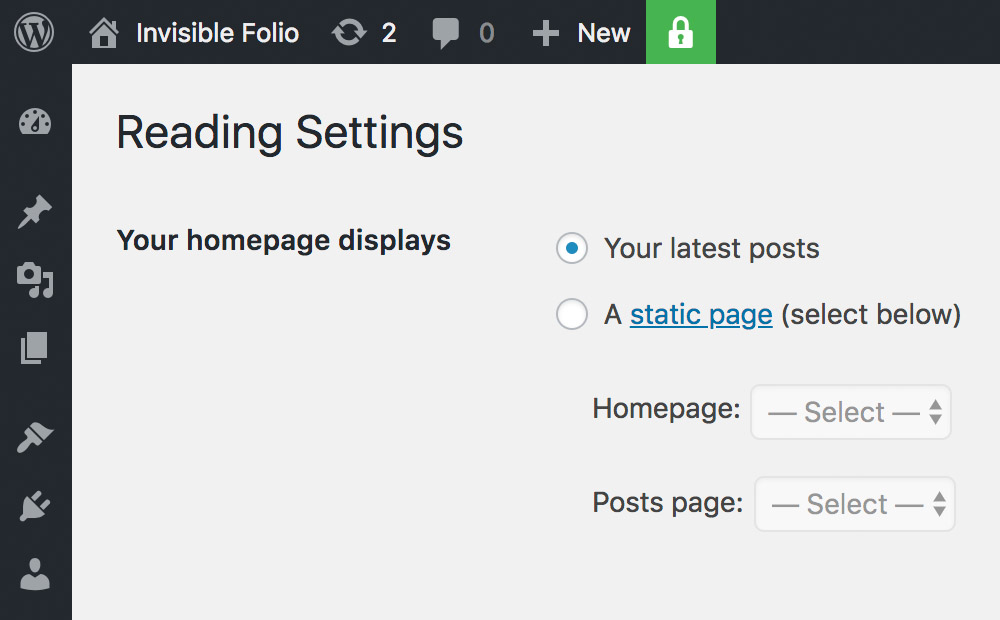
Homepage
By default the homepage acts as an archive page for all of your Posts.
If instead you want to display a single image/video or a slider, create a new page, visit Settings → Reading and tick A static page under Your homepage displays. For Homepage select the desired page. For clarity we recommend you name this page Home.
It is possible to use Invisible as a holding page. Simply set the static homepage and make sure you have no published Posts (drafts / private / password protected are ok). This will hide the menu icon in the top left.
If using a static homepage you can also set the Posts page option. This is not required but will allow you to have a unique link that points to the main archive page.
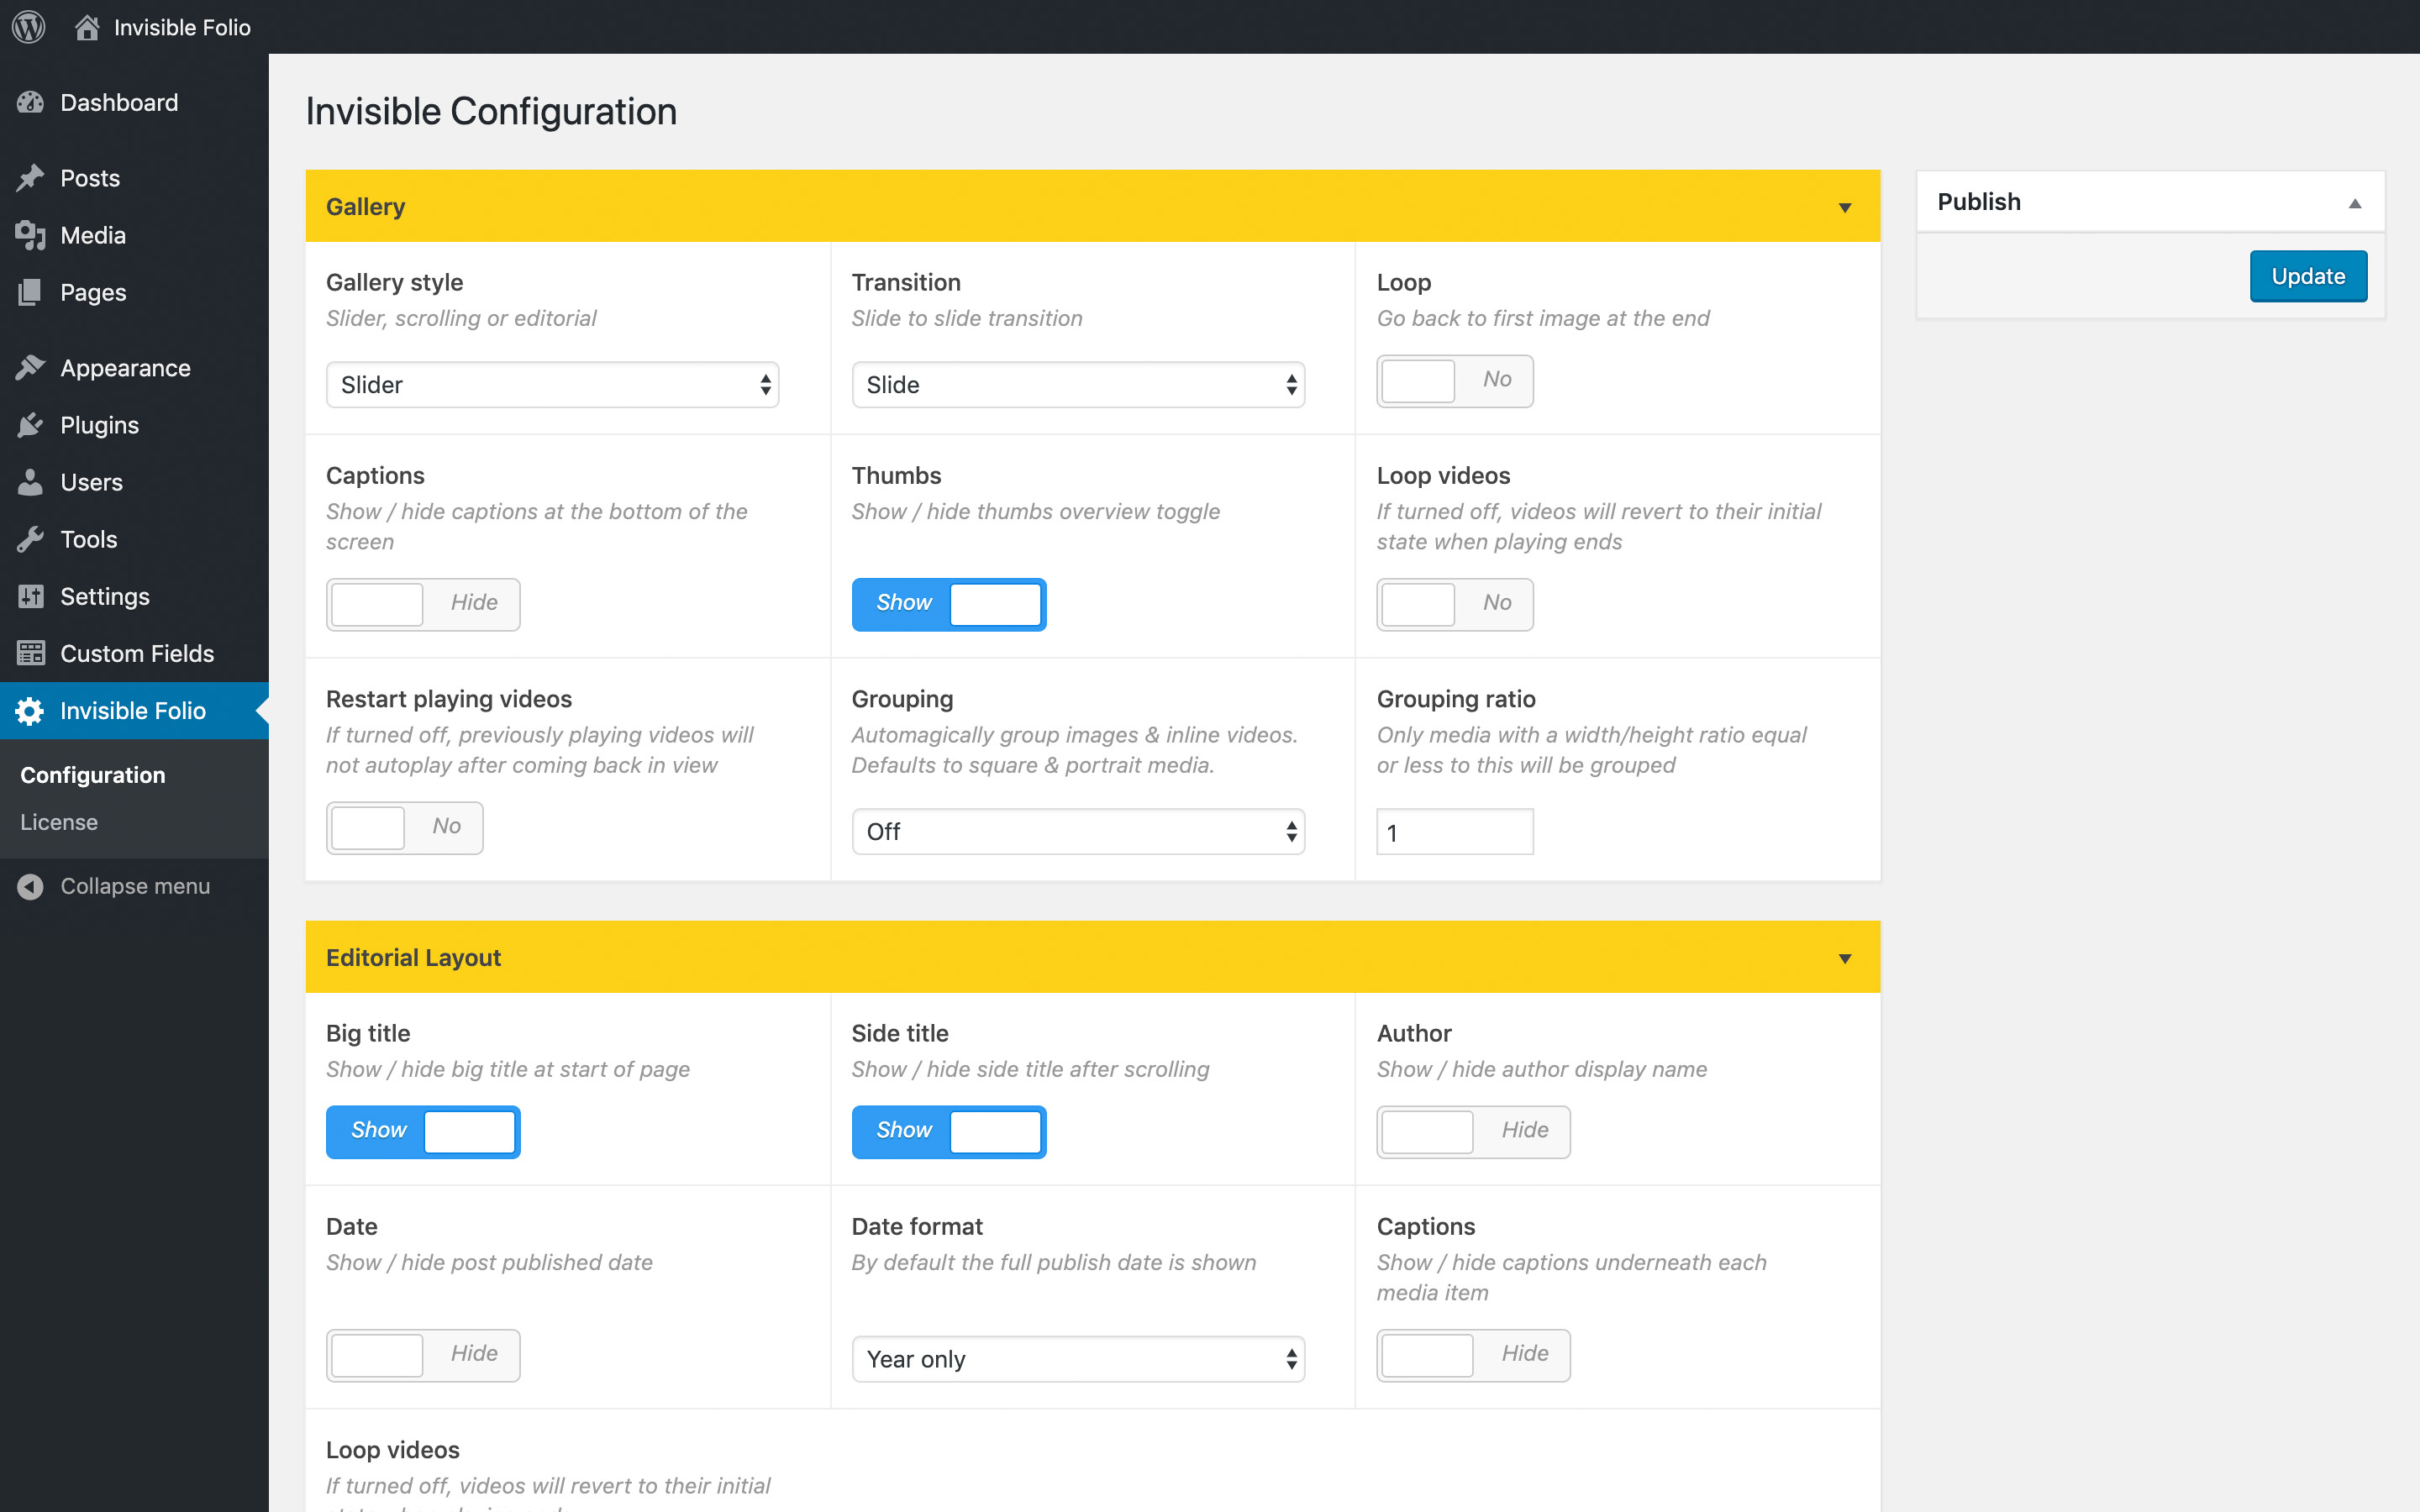
Posts / Default Gallery
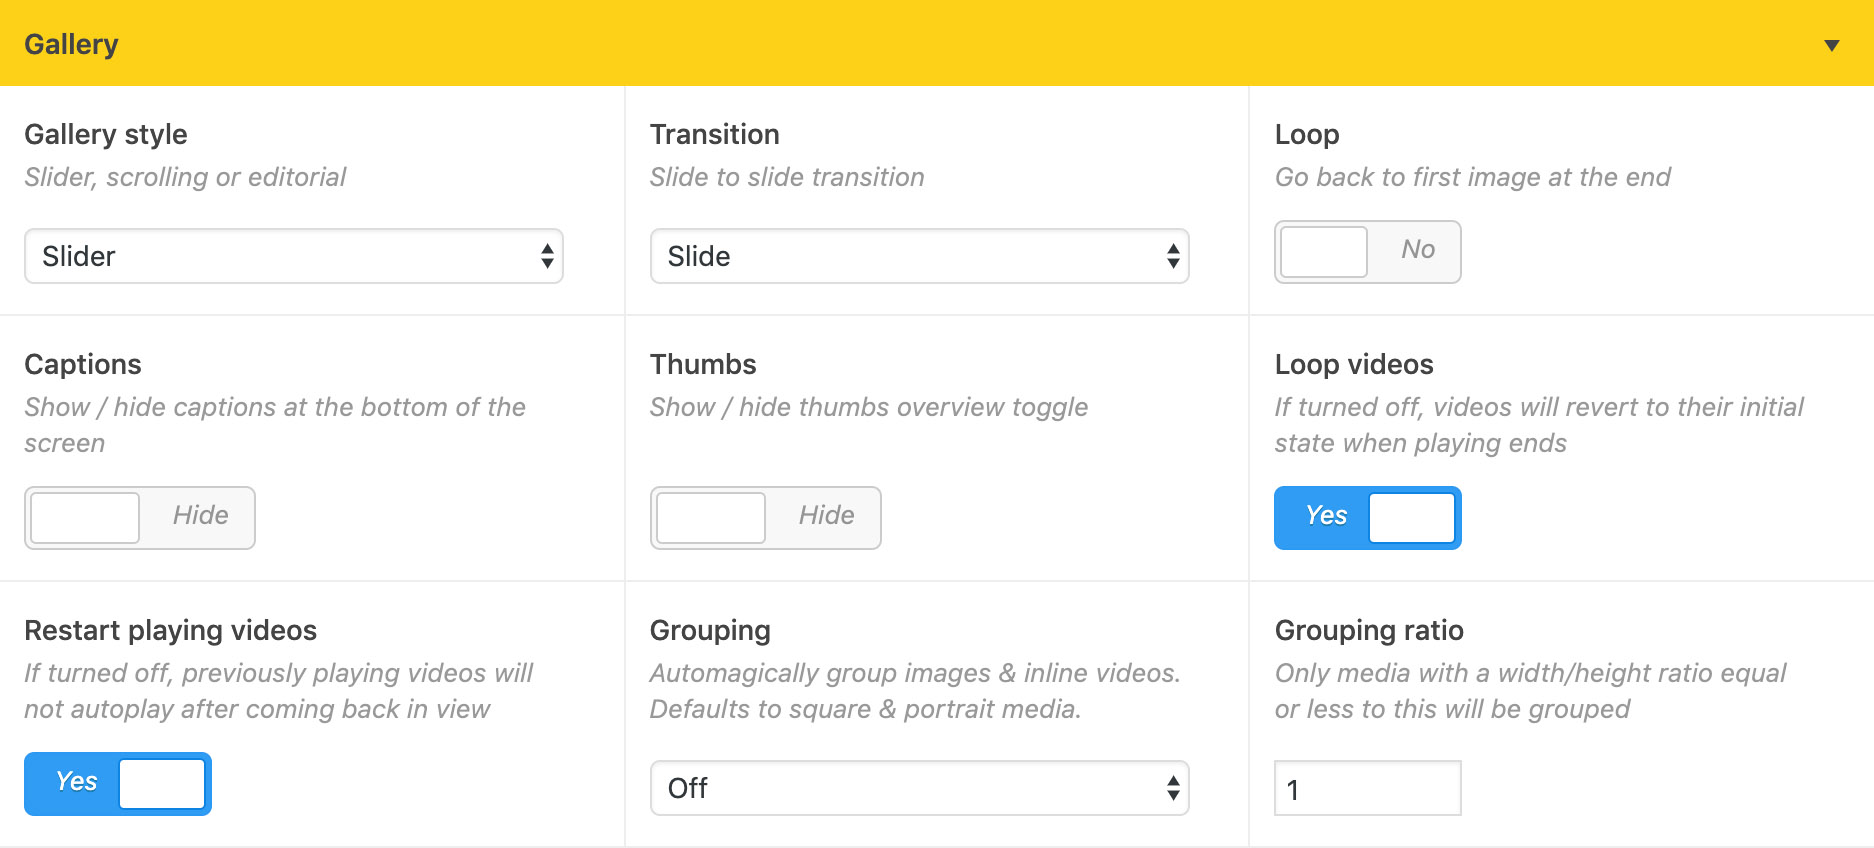
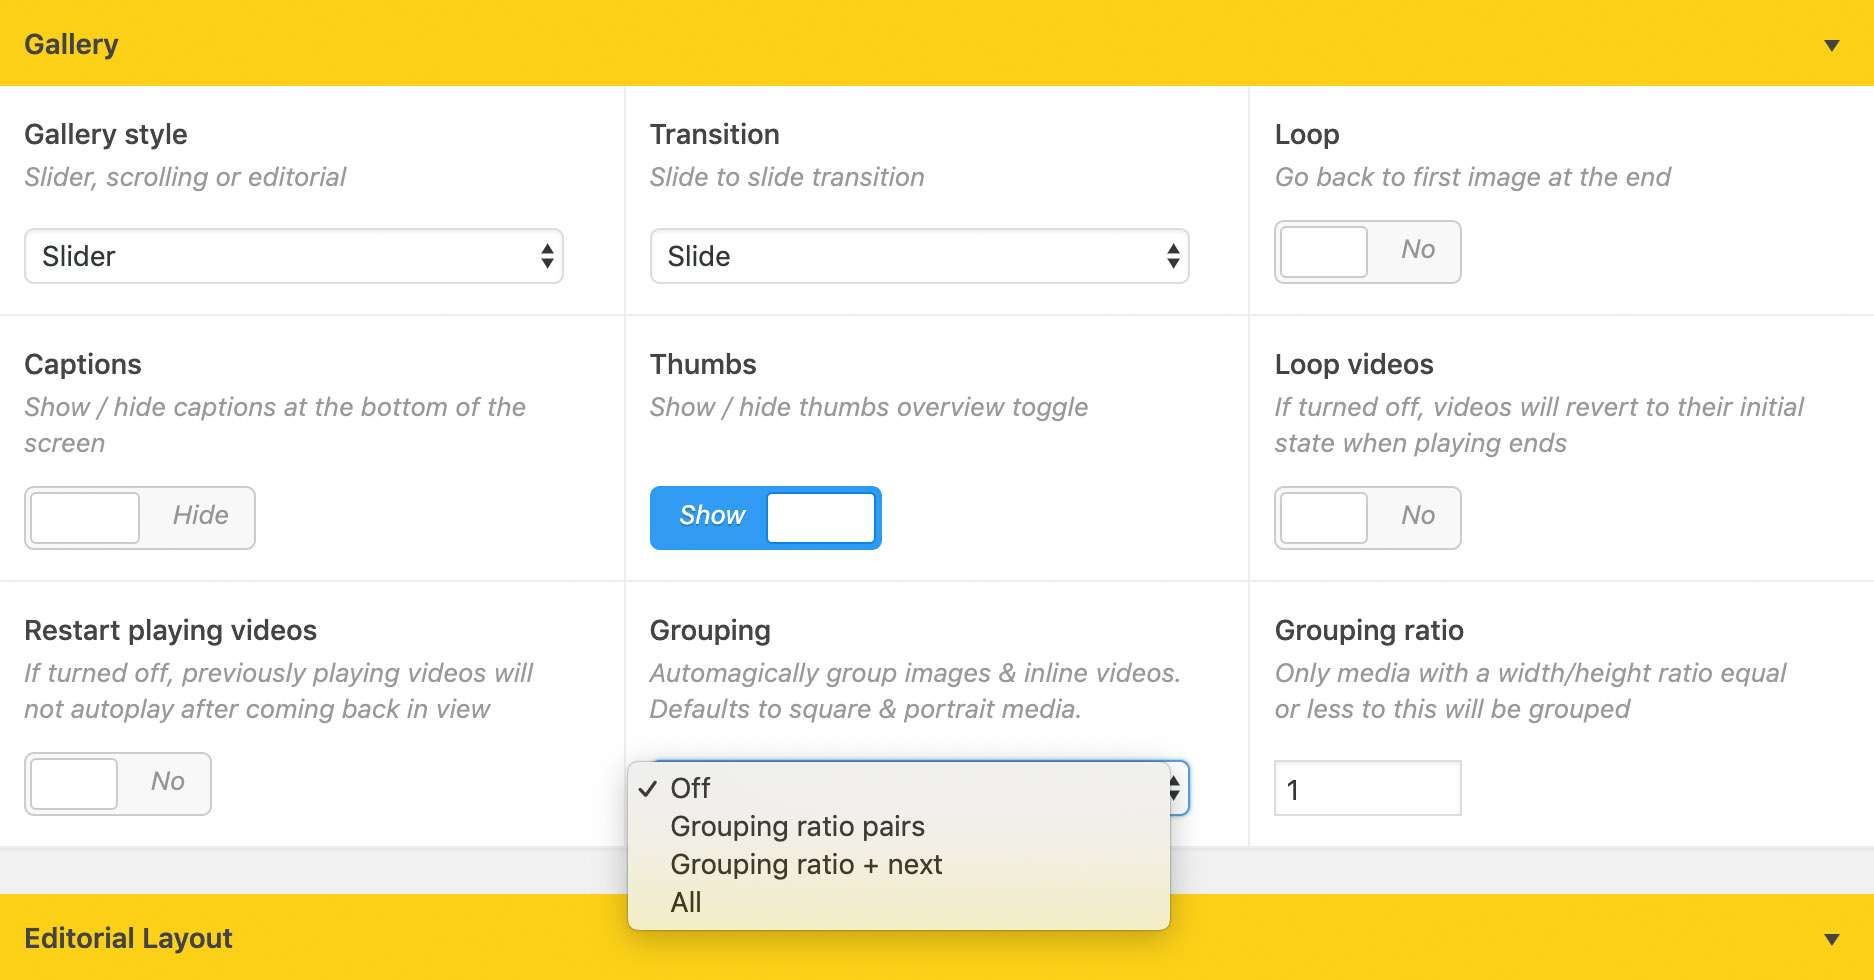
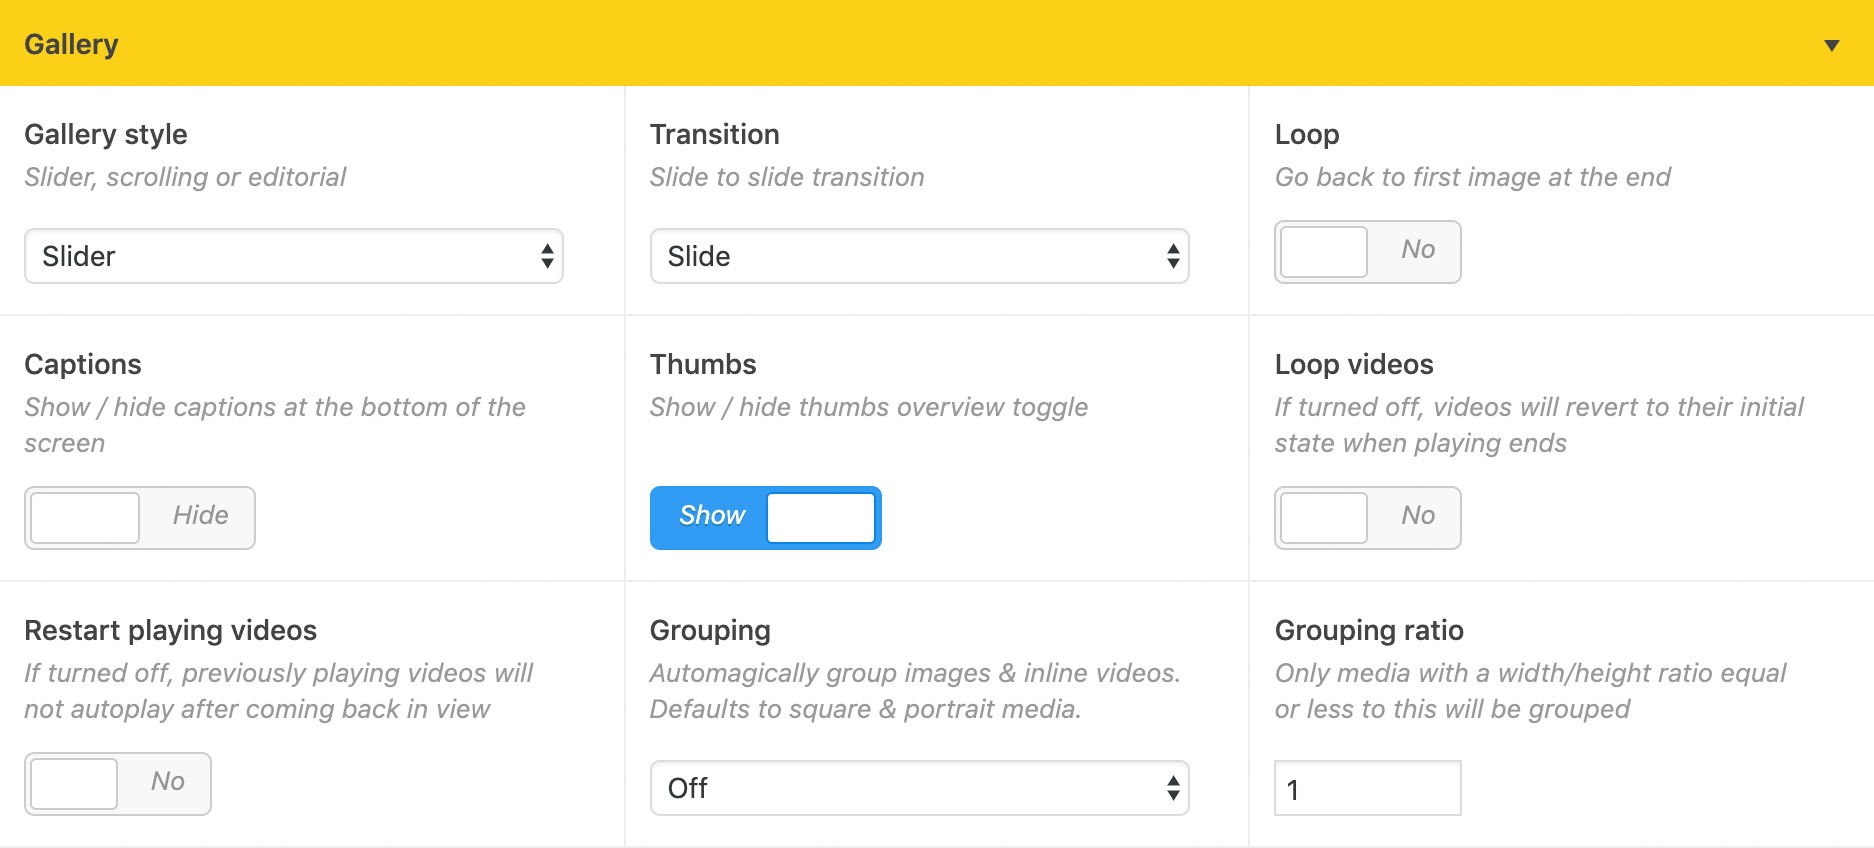
Posts hold your work and every post has an associated image gallery. Invisible supports either sliding or scrolling galleries. For both options, images fit the screen, with the user interface being optimised for maximum display space.
Image sliders support several transition types (eased sliding, fade and no transition), which can be set globally on the options page and also overwritten for each post. On touch devices eased sliding will be used irrespective of the above setting.
Looping playback is also supported.
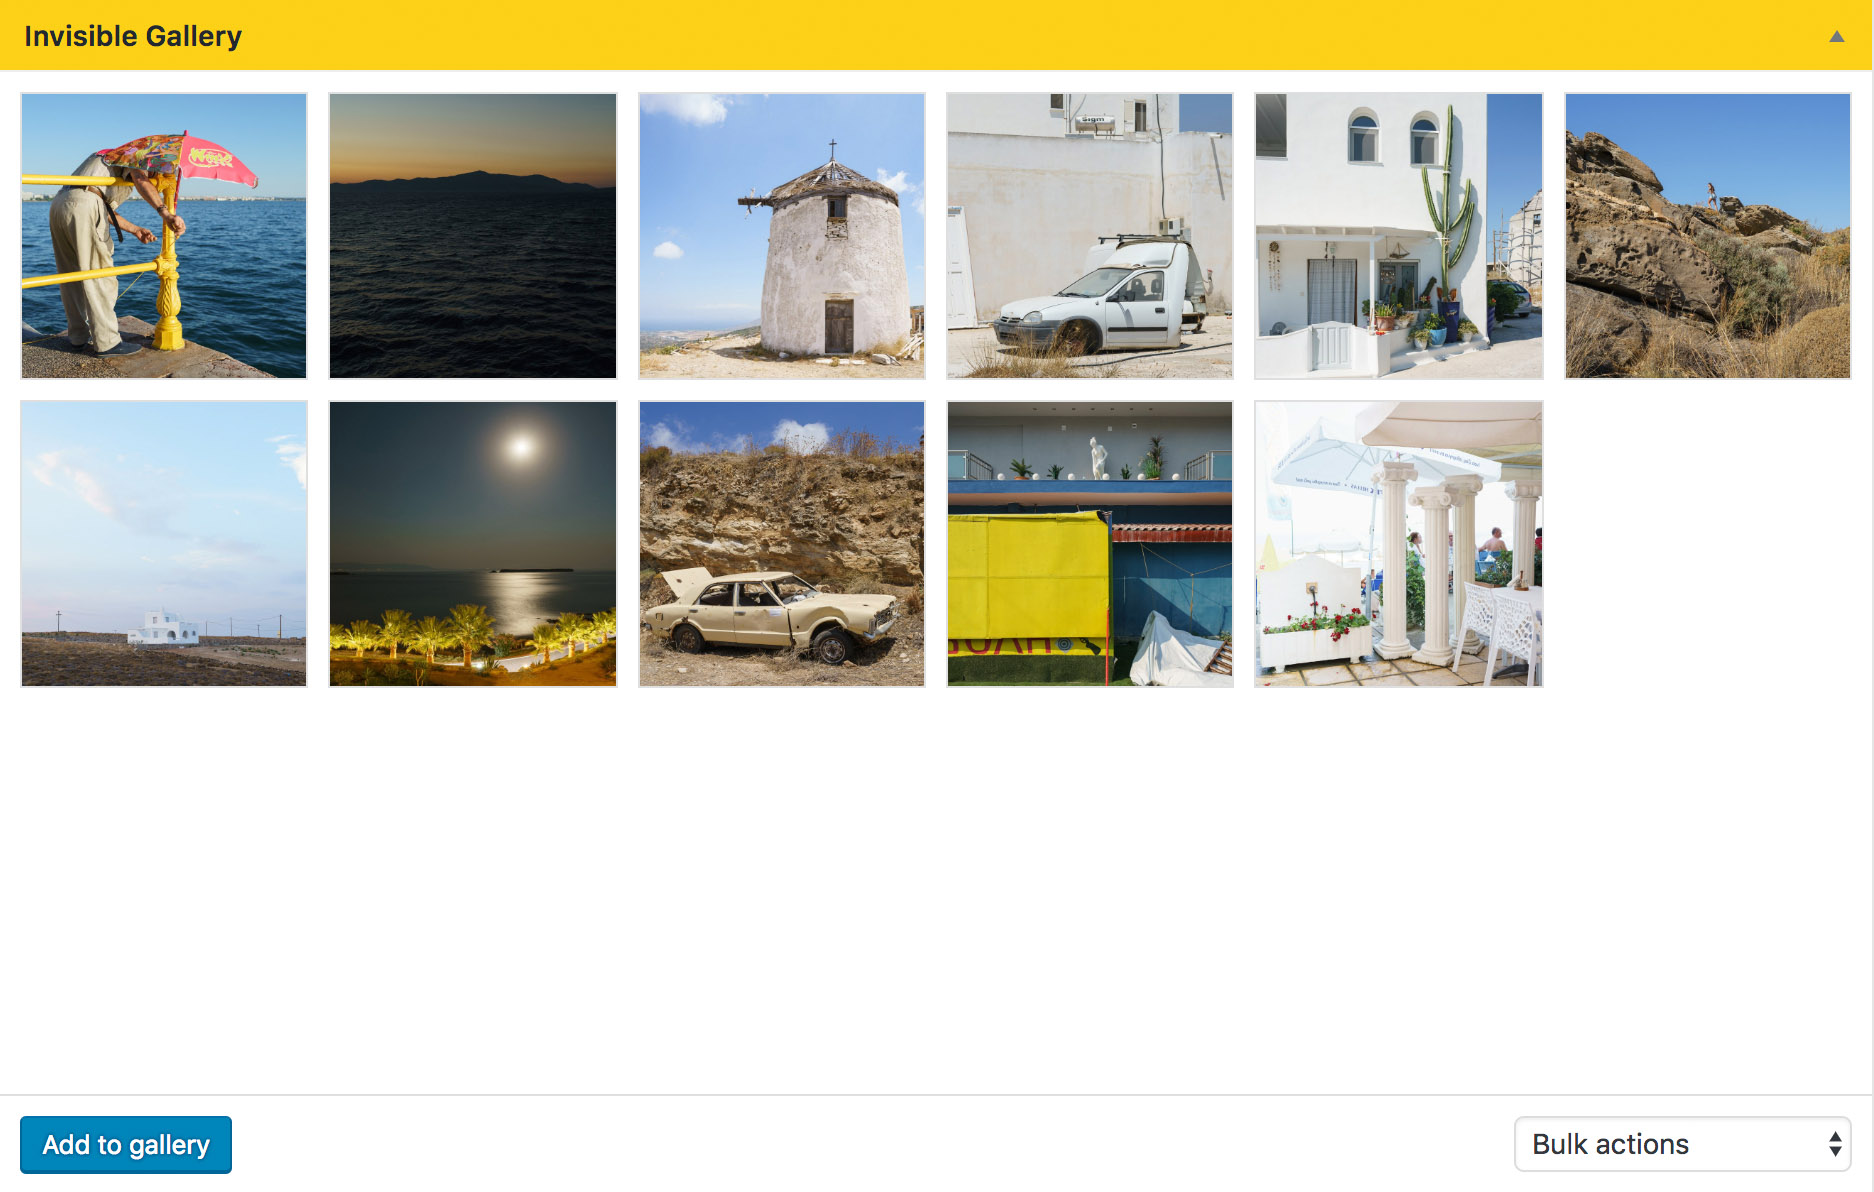
Uploading
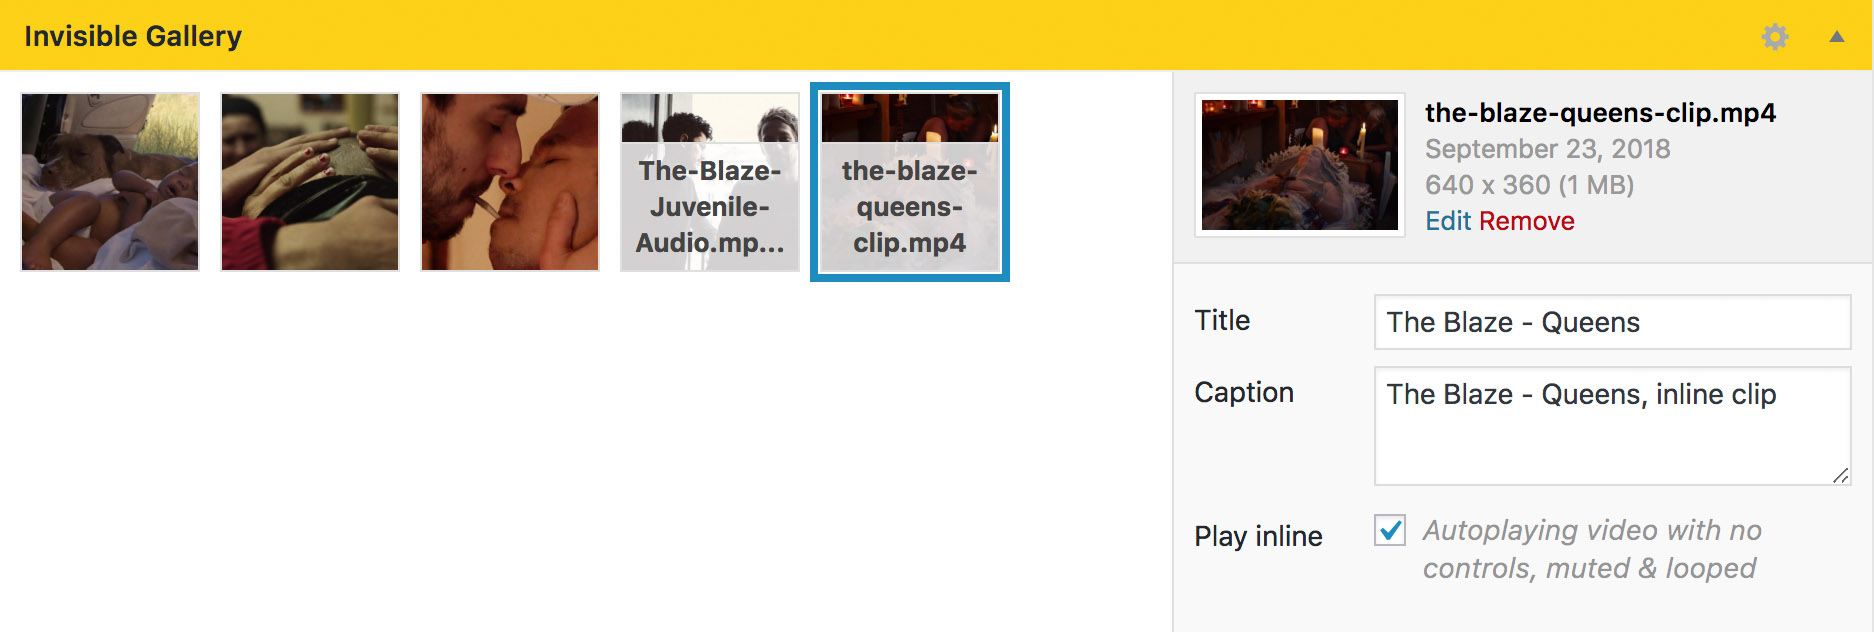
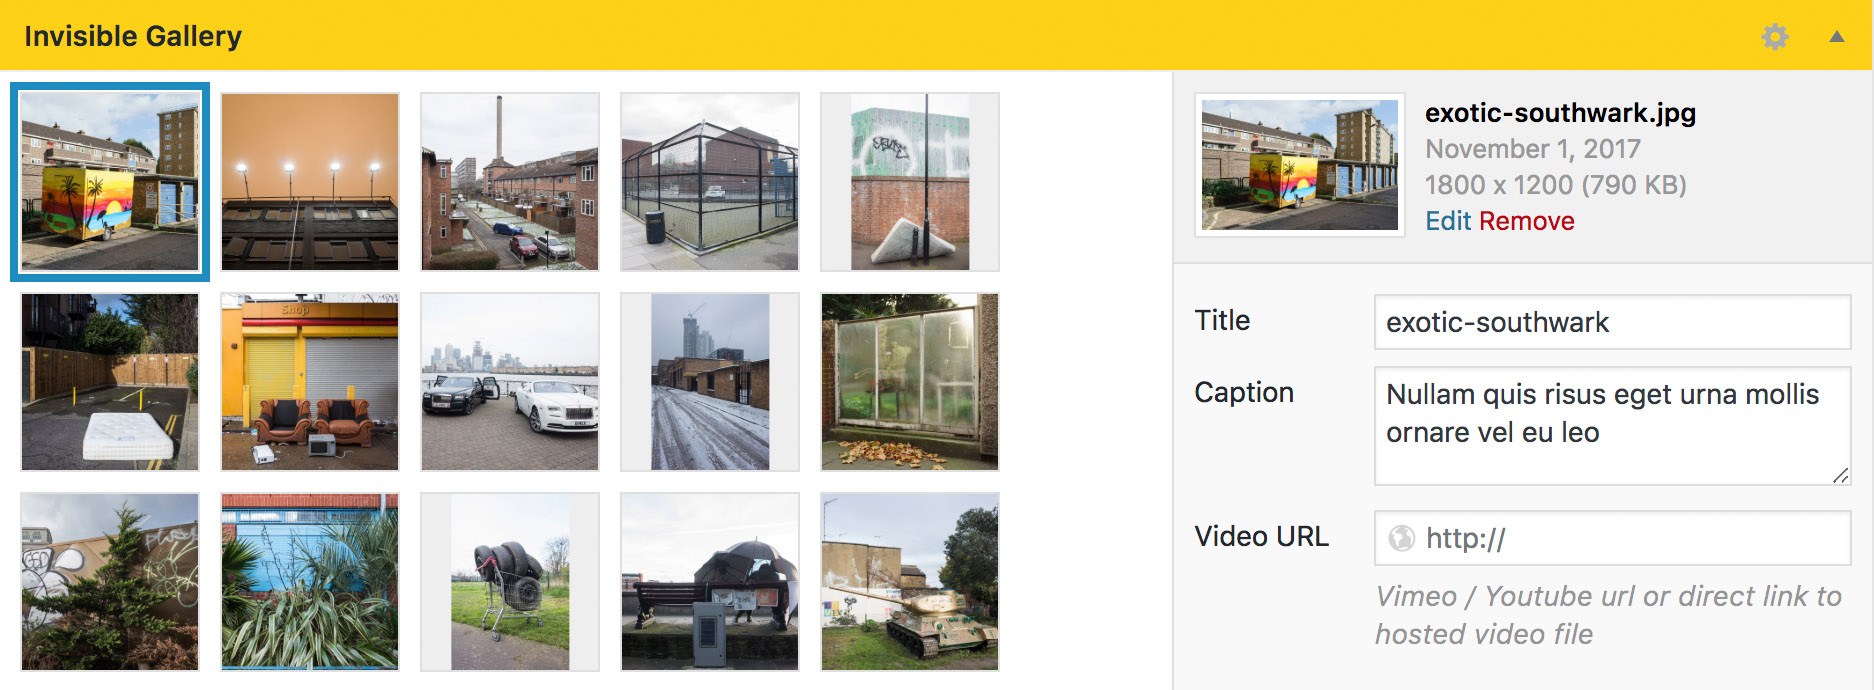
Media can easily be uploaded in the Invisible Gallery section of the Post admin screen. Click Add to gallery, upload and tick the desired files, then hit Select. Remember to always click Publish / Update in the top right to save any changes you've made to a Post.
Images
We recommend uploading JPGs in the majority of cases, PNGs should only be used for vector graphics. GIFs are also supported, but keep in mind they will be used at the original dimensions throughout (thumbnails included), so file size should be kept as small as possible.
Videos
We recommend using an external video hosting service, at the moment Youtube and Vimeo are supported. To add a Vimeo/Youtube video, upload a cover image of the same aspect ratio as the video and fill in the Video URL field with the link to the video page (eg. https://vimeo.com/222486164), not the embed link.
If you have a Vimeo Pro account or want to link to mp4 files hosted elsewhere, use the same method described above.
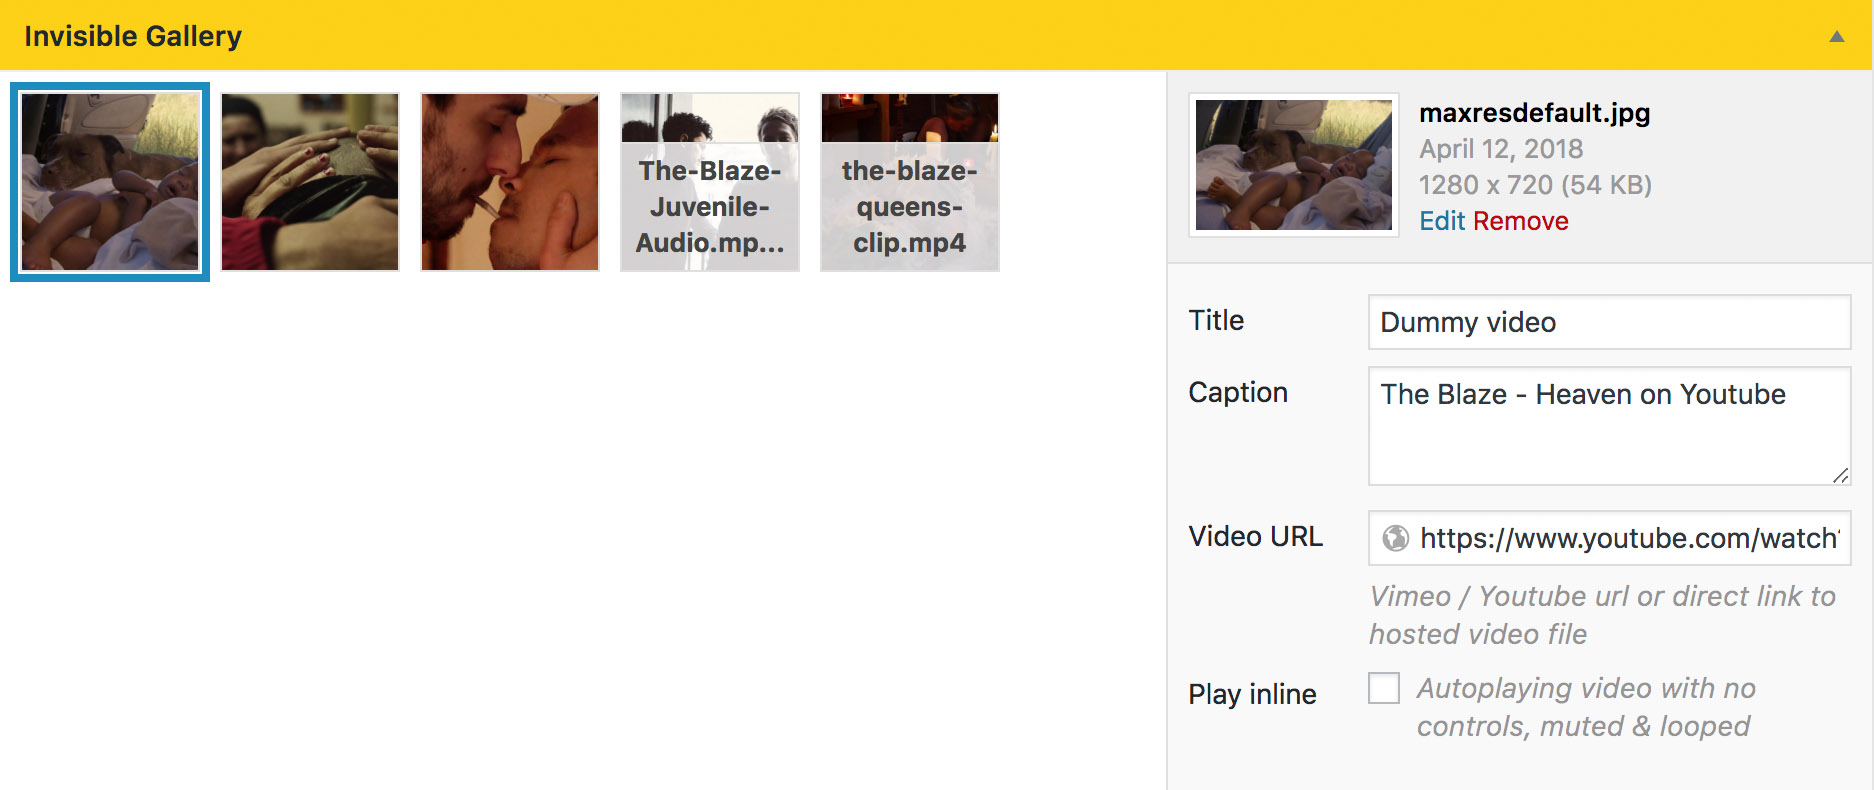
You can also upload mp4 files directly (provided the hosting allows uploads of that size). To add a poster image for directly uploaded mp4 files, go to the Media page, find the desired upload and use the Featured Image functionality.
Mp4s, either linked or directly uploaded can also be used as inline loops (autoplaying & muted) by ticking the Play inline checkbox.
Video players loop by default and automatically resume playback when coming back into view. This behaviour can be changed globally using the dedicated settings on the Configuration page or individually for each post.
Grouping
Smart grouping is supported for images and inline videos in pairs. Grouping can either be enabled for all images in a gallery or selectively, using a customisable ratio to determine which images are paired. On mobile the pairs are automatically separated into individual slides, to maximise viewing space.
Text
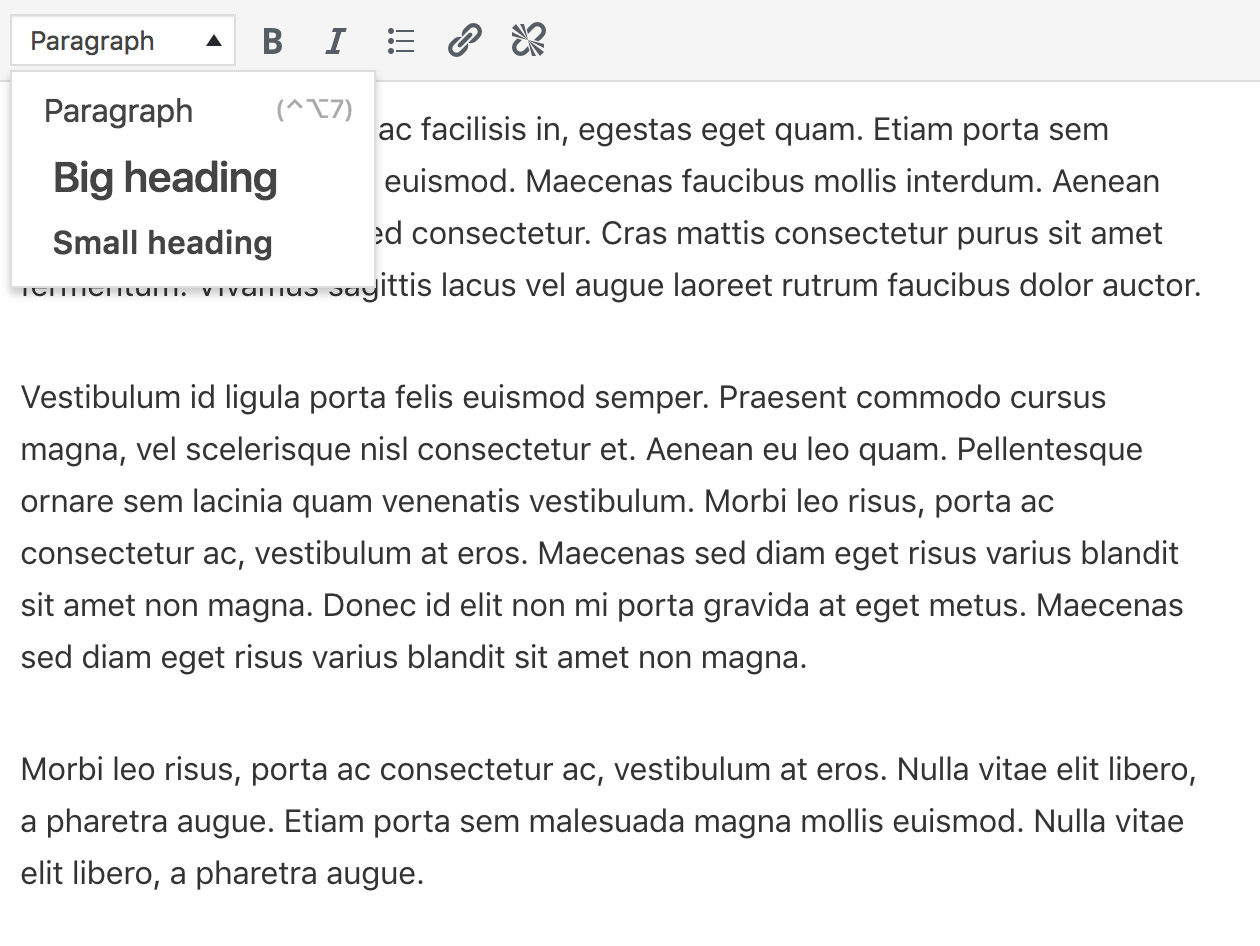
Every Post has an Editor area where you can provide information on the work. There are several formatting options, including big and small headings, paragraph text, bold & italic (if using custom fonts be sure to also include all required font files), unordered lists and links.
Remember to always click Publish / Update in the top right to save any changes you've made to a Page.
On the actual site, the text panel is accessed by clicking the Info button. If not text is provided, this will be hidden.
Captions
You can add short image/video captions in the Caption field associated to each gallery upload. Captions are hidden by default, and can be either globally enabled from the theme options page or on a per-post basis.
Thumbs overview
If enabled, this will display a Thumbs link next to Info button, allowing visitors to scan through all the images in a gallery and quickly navigate to any one of them.
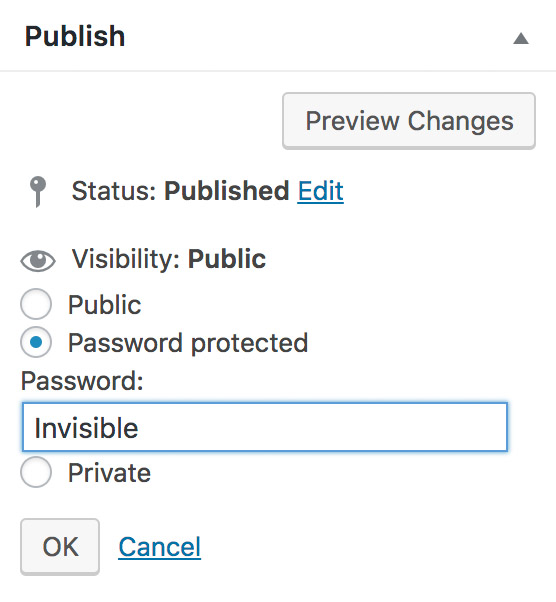
Password protected posts
If you want to share work with clients, you can create Password Protected posts that will be excluded from all archive pages and that can only be viewed by those who know the link and password.
These are different from Private posts which only you or other users logged-in to the site can see. On the archive pages, these are clearly marked with the prefix Private:.
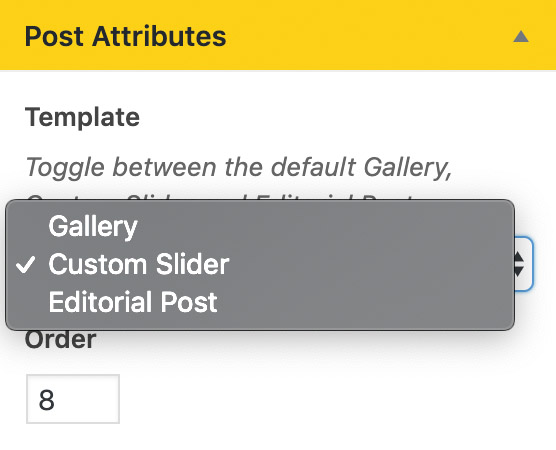
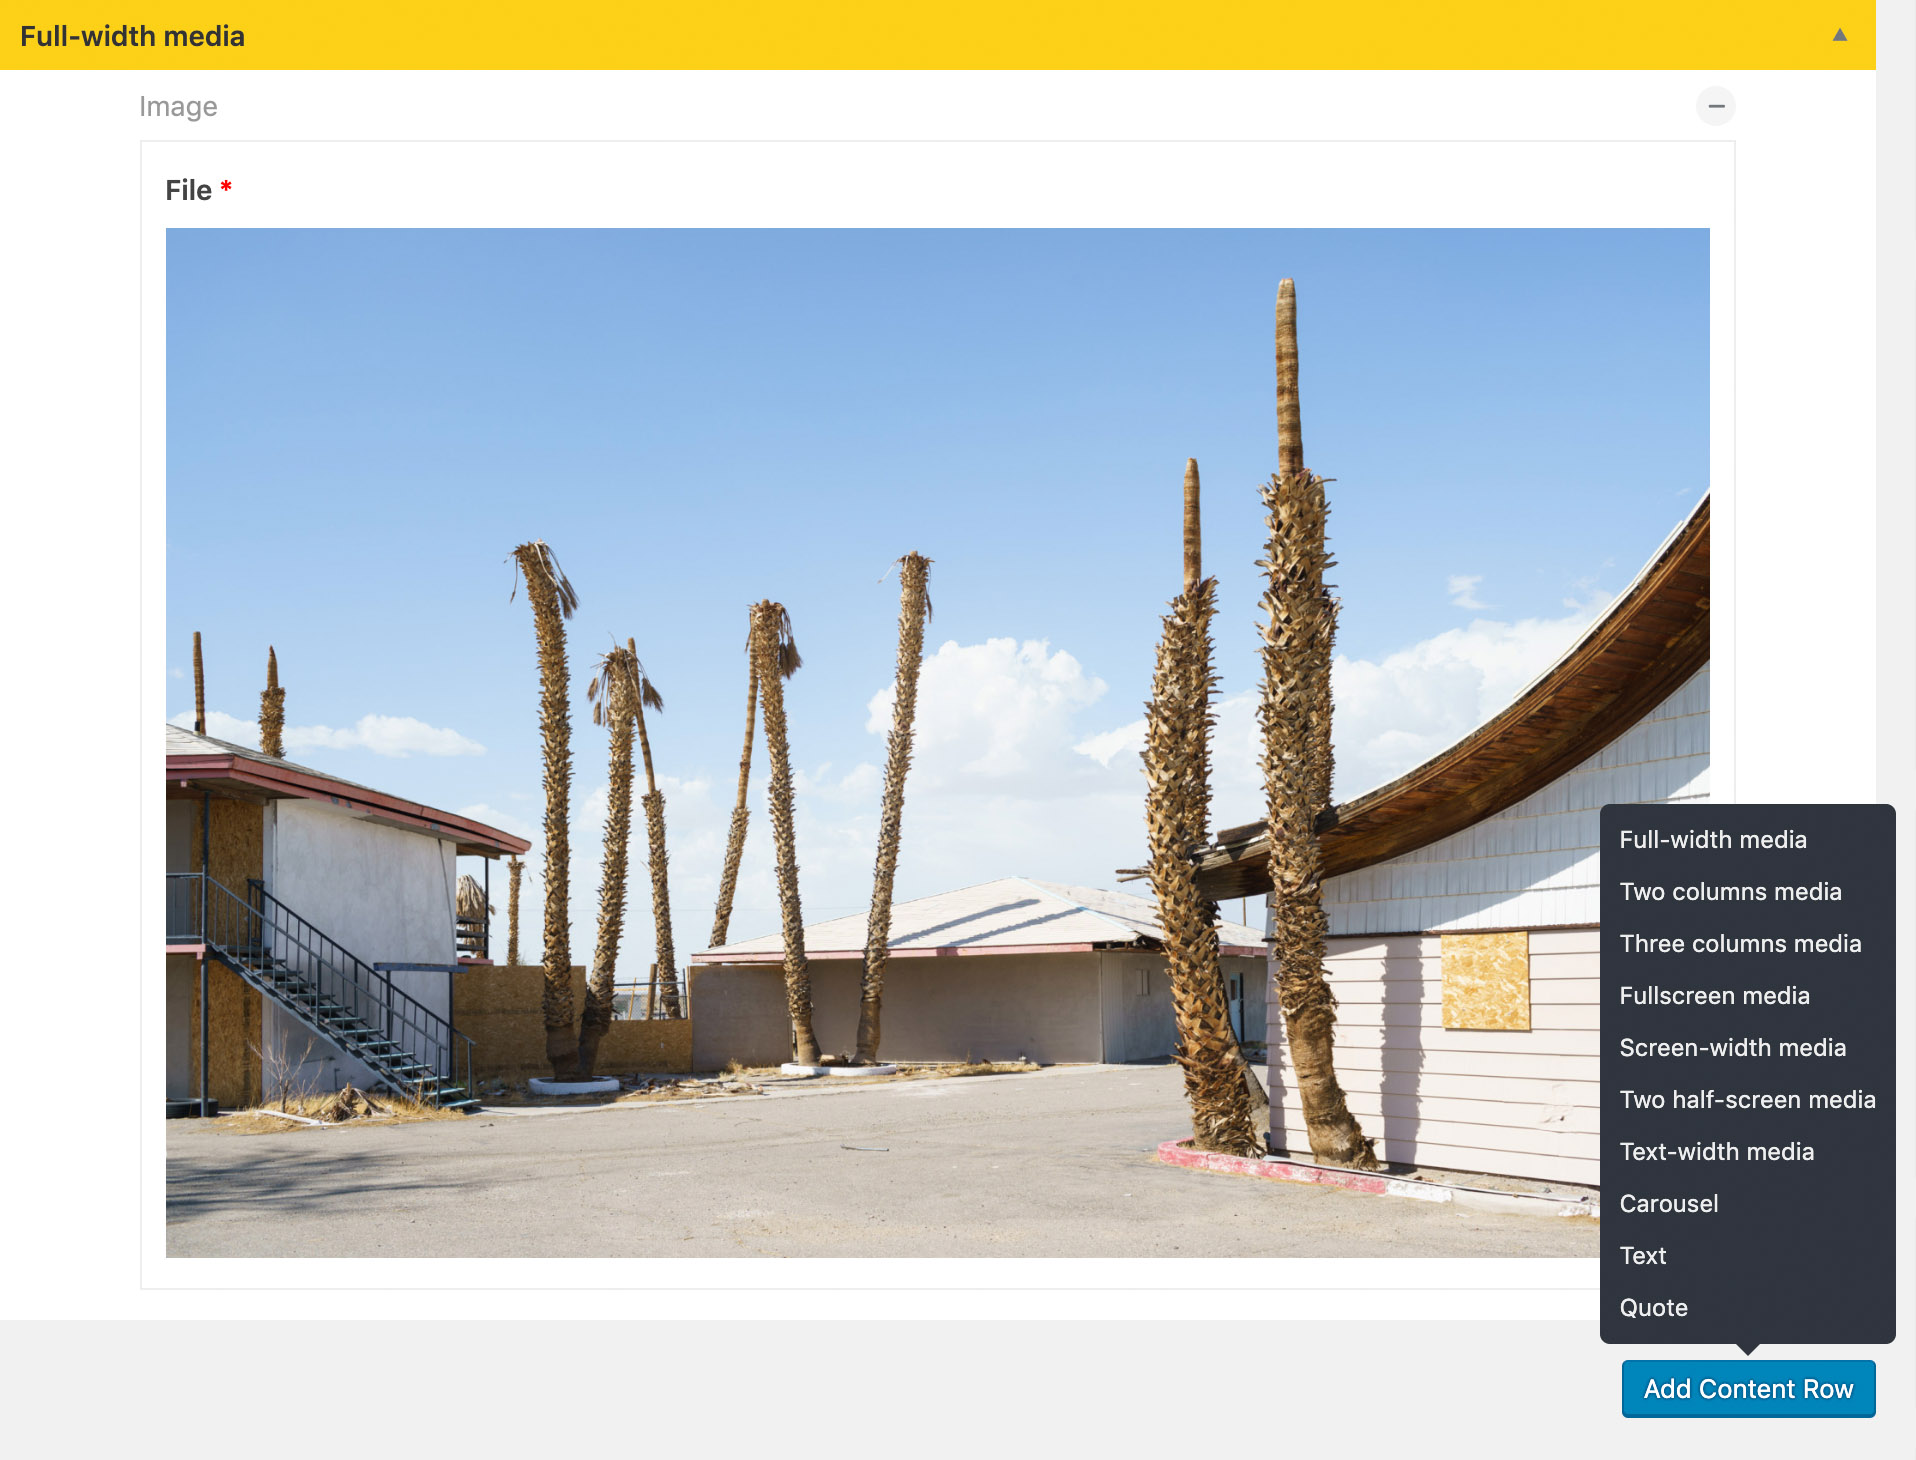
Posts / Custom Slider
If you prefer to have more control over the look of the slider, and also achieve pairings which are not possible with the automatic grouping option, then you should opt for the
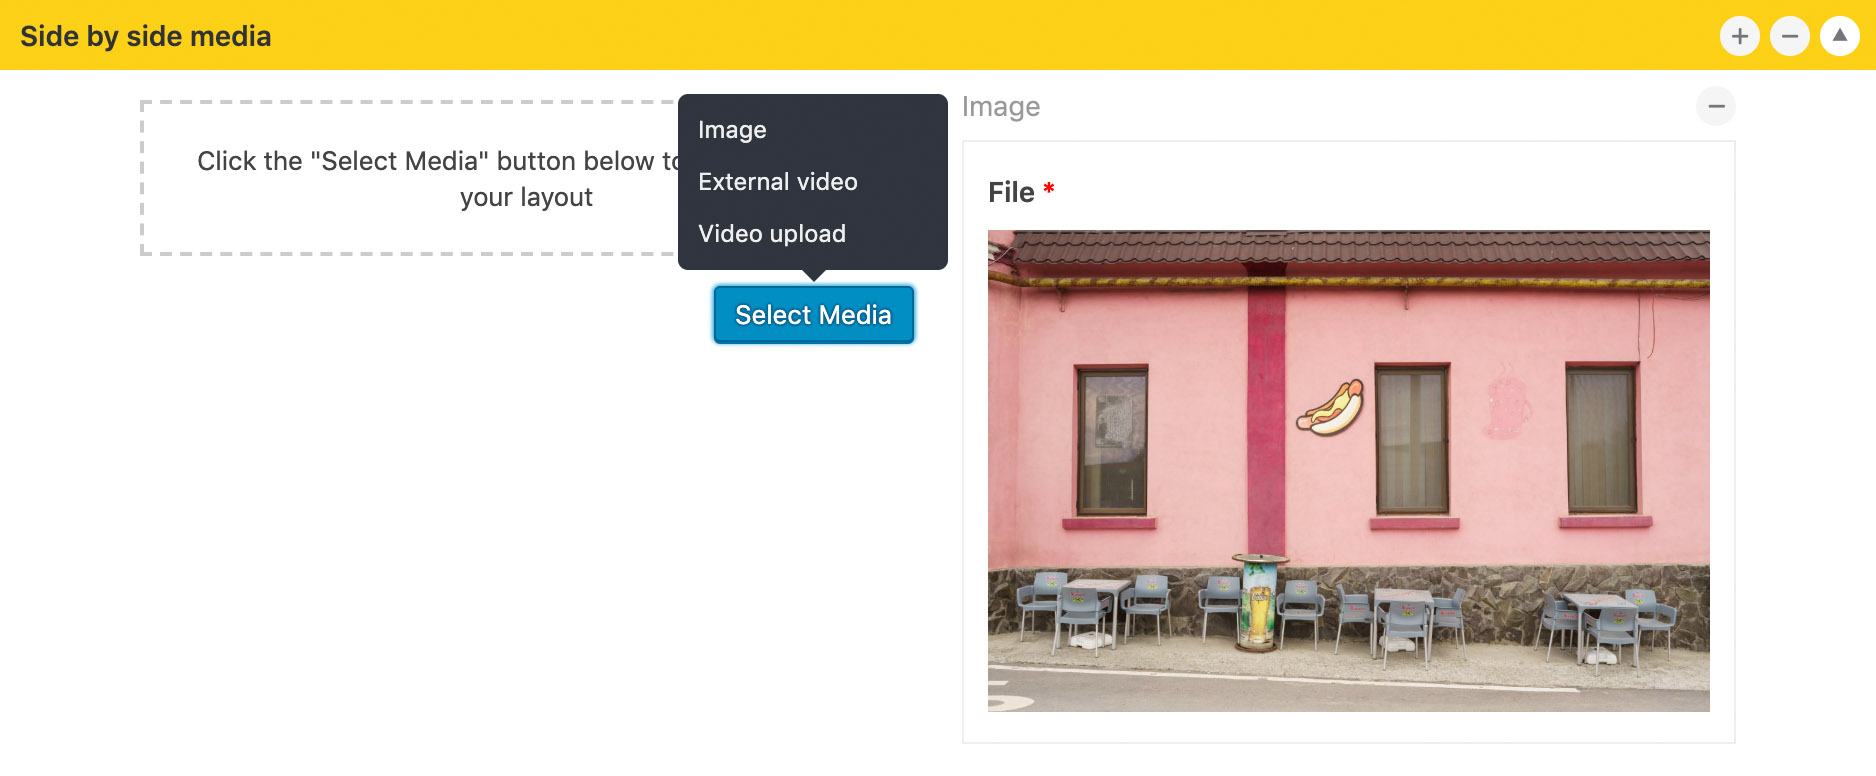
This will replace the gallery field with an area that can be populated with modules by pressing the Add Content Row button and selecting the desired one.
After a module is selected, you will need to decide which king of media you want to include in each of the available boxes. You can choose between Image, External video or Video upload.
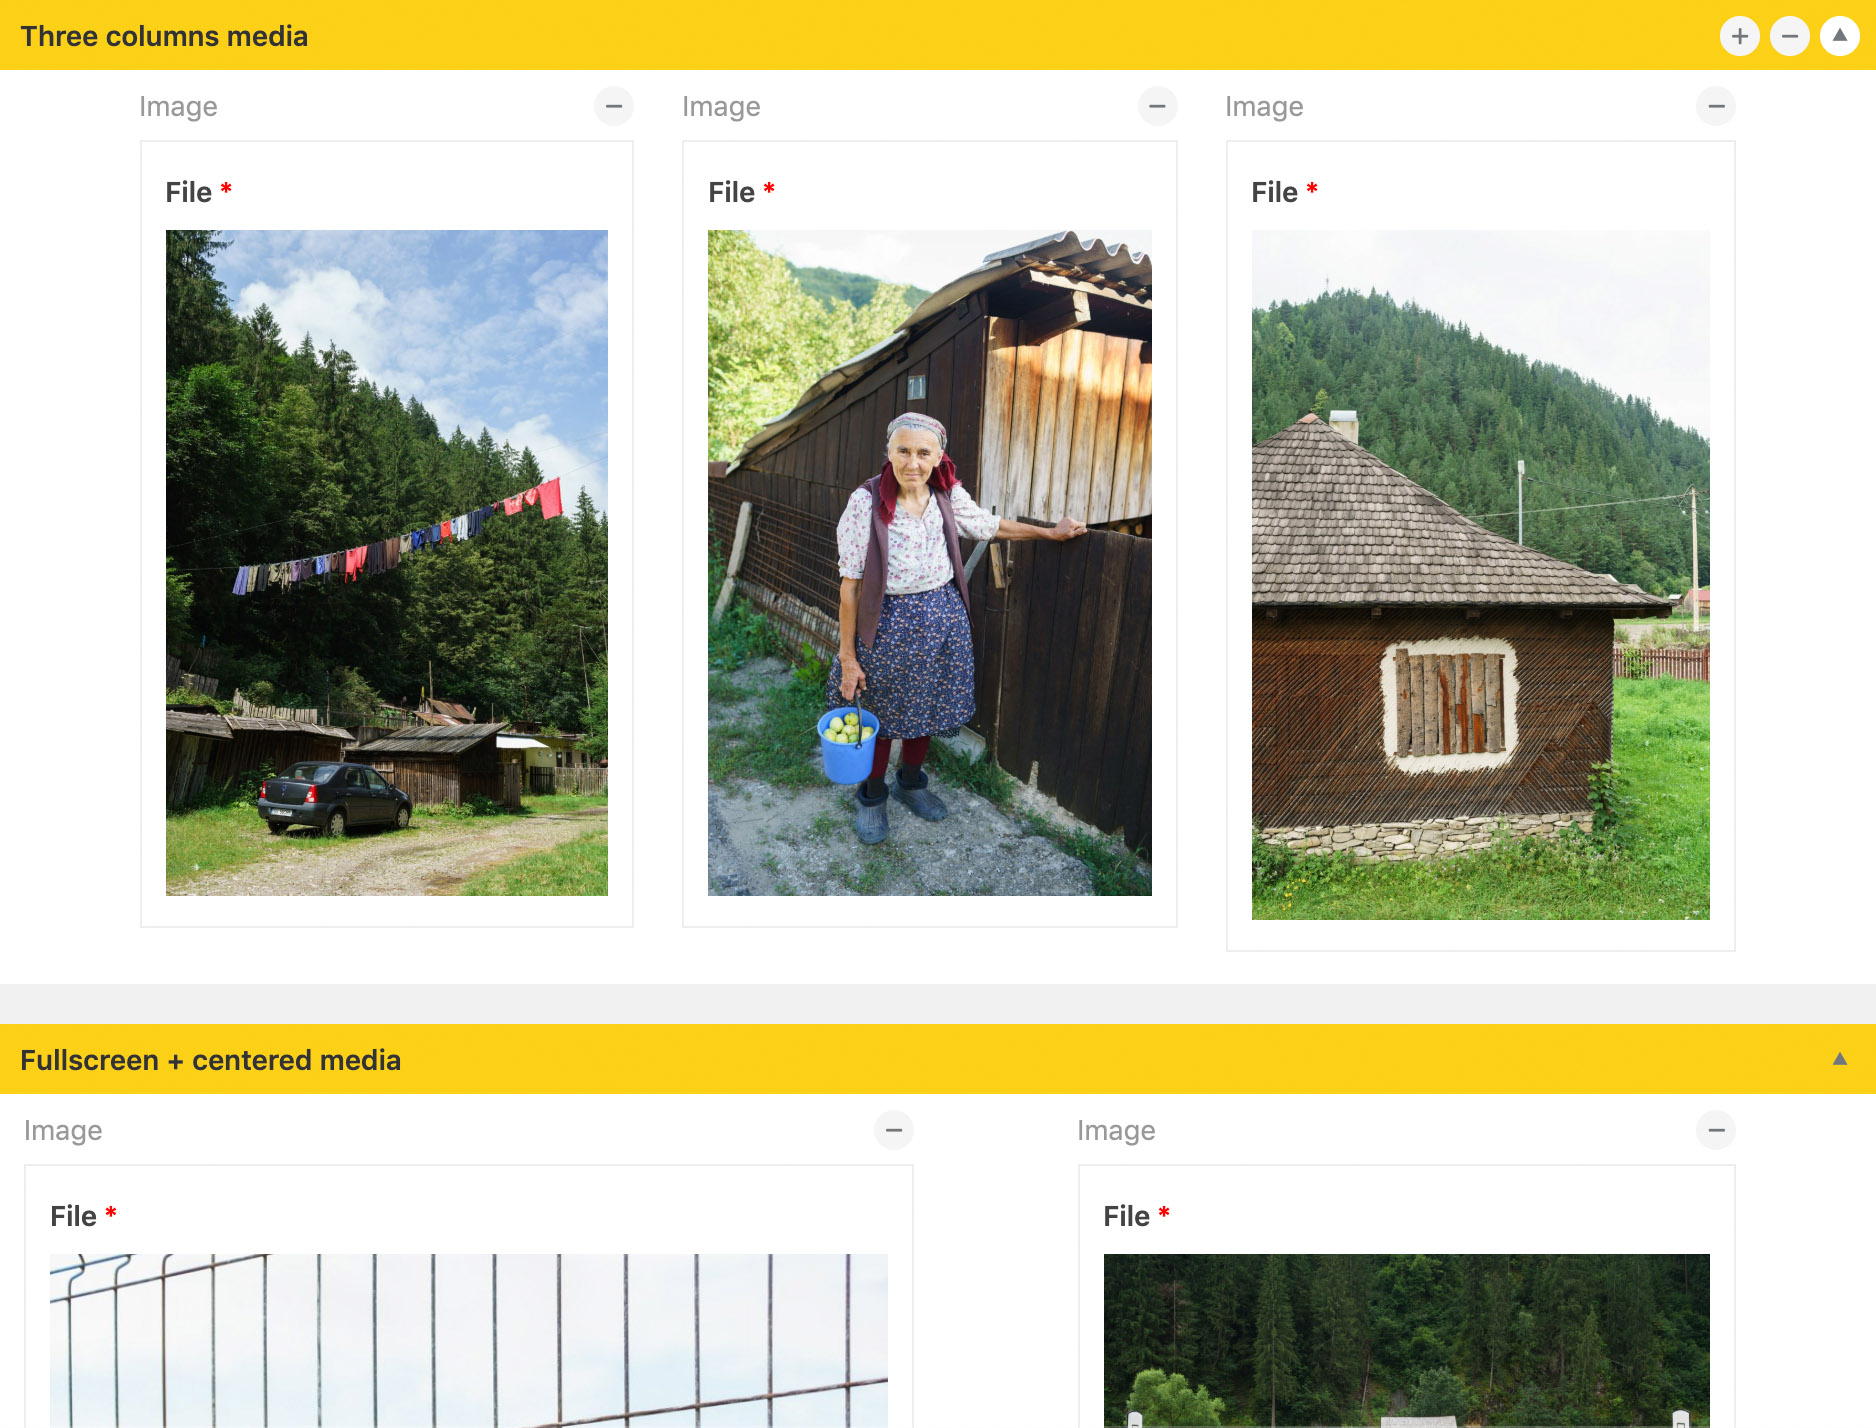
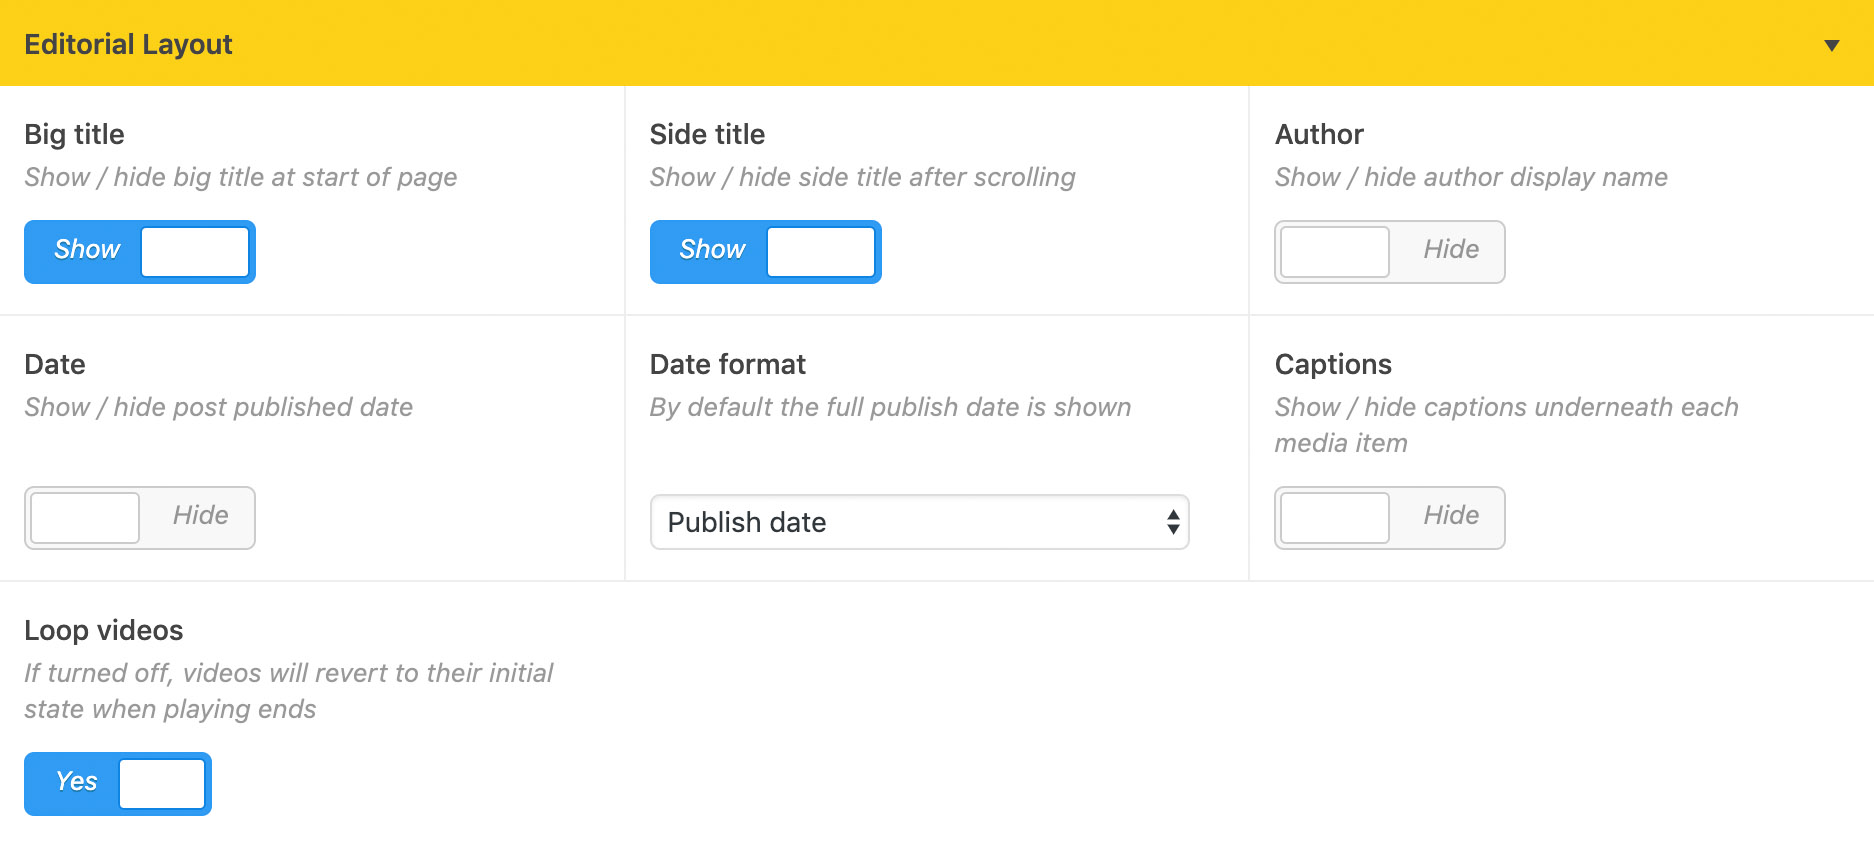
Posts / Editorial
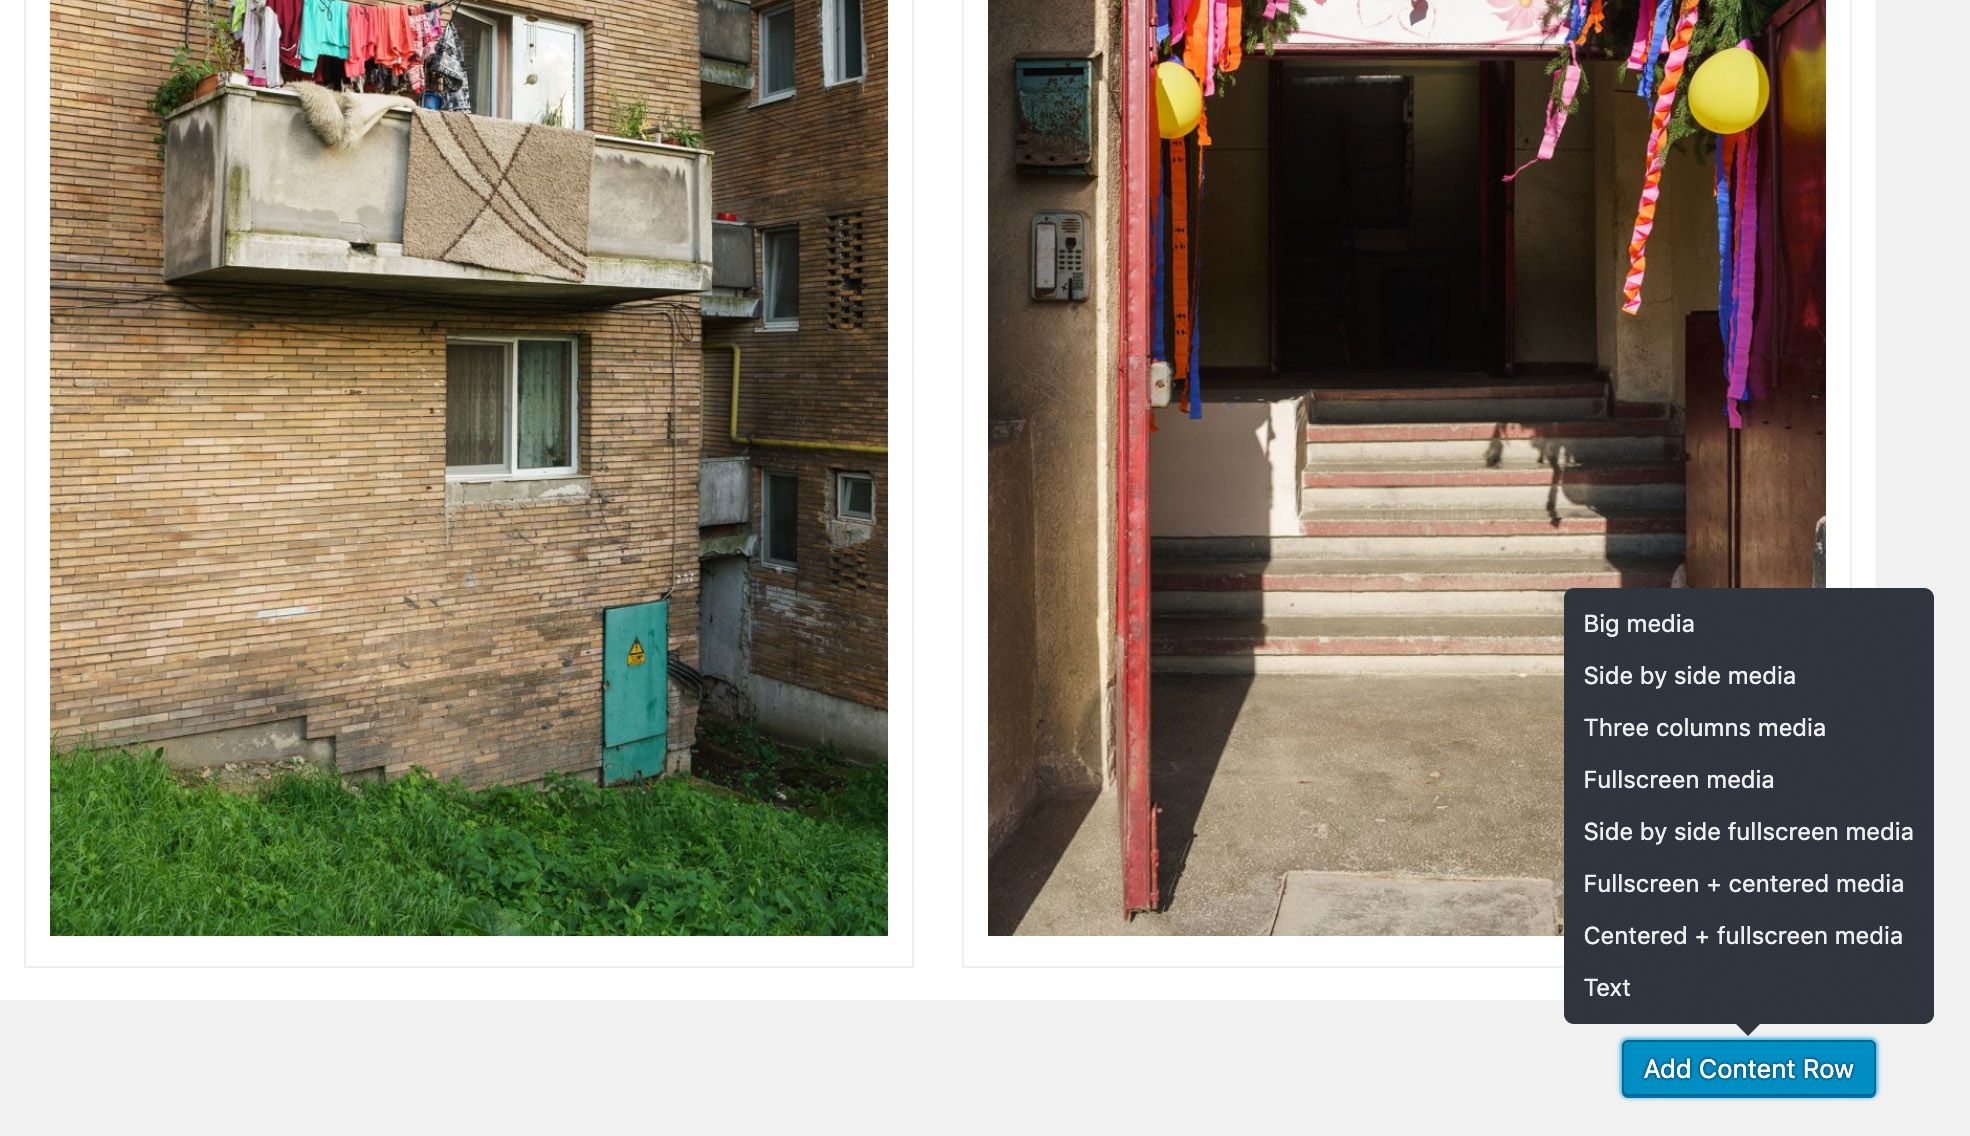
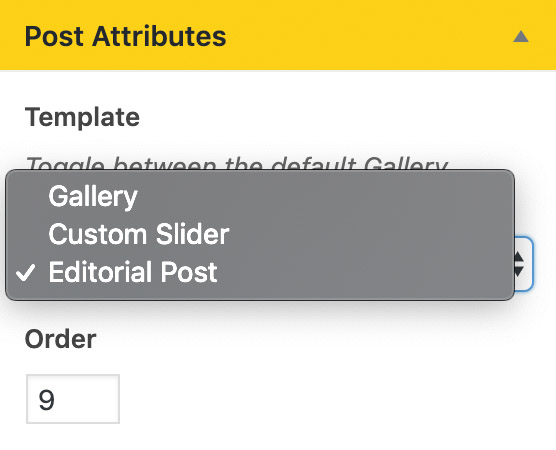
If galleries don't offer enough flexibility, you can also make use of editorial layout, which support a variety of gridded media modules and are also the perfect option for long-form text. To enable them, in the post edit screen select the Editorial Post Template option under Post Attributes.
This will replace the gallery field with an area that can be populated with modules by pressing the Add Content Row button and selecting the desired one.
After a module is selected, you will need to decide which king of media you want to include in each of the available boxes. You can choose between Image, External video or Video upload.

You can also control various display options in the relevant section under Configuration. For example, if you want to create a blog/news section and use this layout there, you might want to enable the display of the Author name and Publish date. Also, if show Big title is enable and a "Fullscreen media" or "Screen-width media" modules is the first on the page, the title will automatically overlay the image, actin as a cover slide.
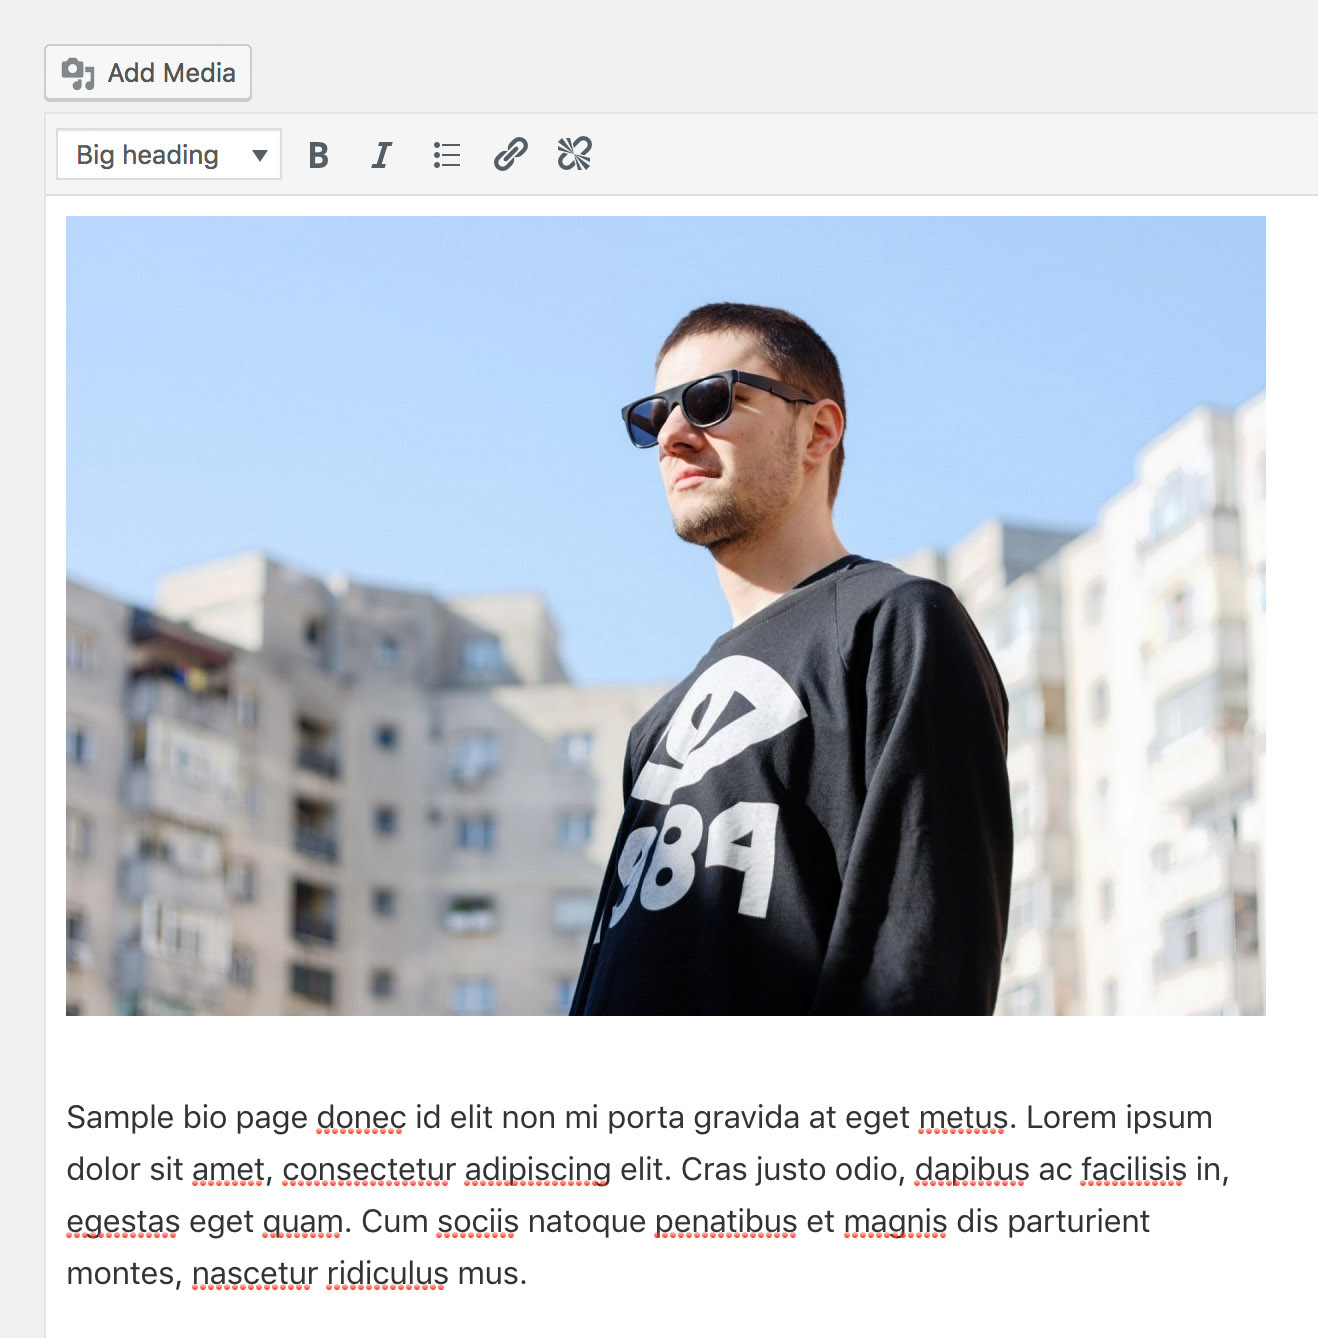
Pages / Text
Besides Posts, you can also create independent text Pages (About, Bio, Contact, Exhibitions, etc). These are displayed in the info panel and live in the top right of the main menu bar. Text entry is done via the Editor, similarly to Posts. You can also include images (eg. portrait on bio page) via the "Add Image" button.
Archives
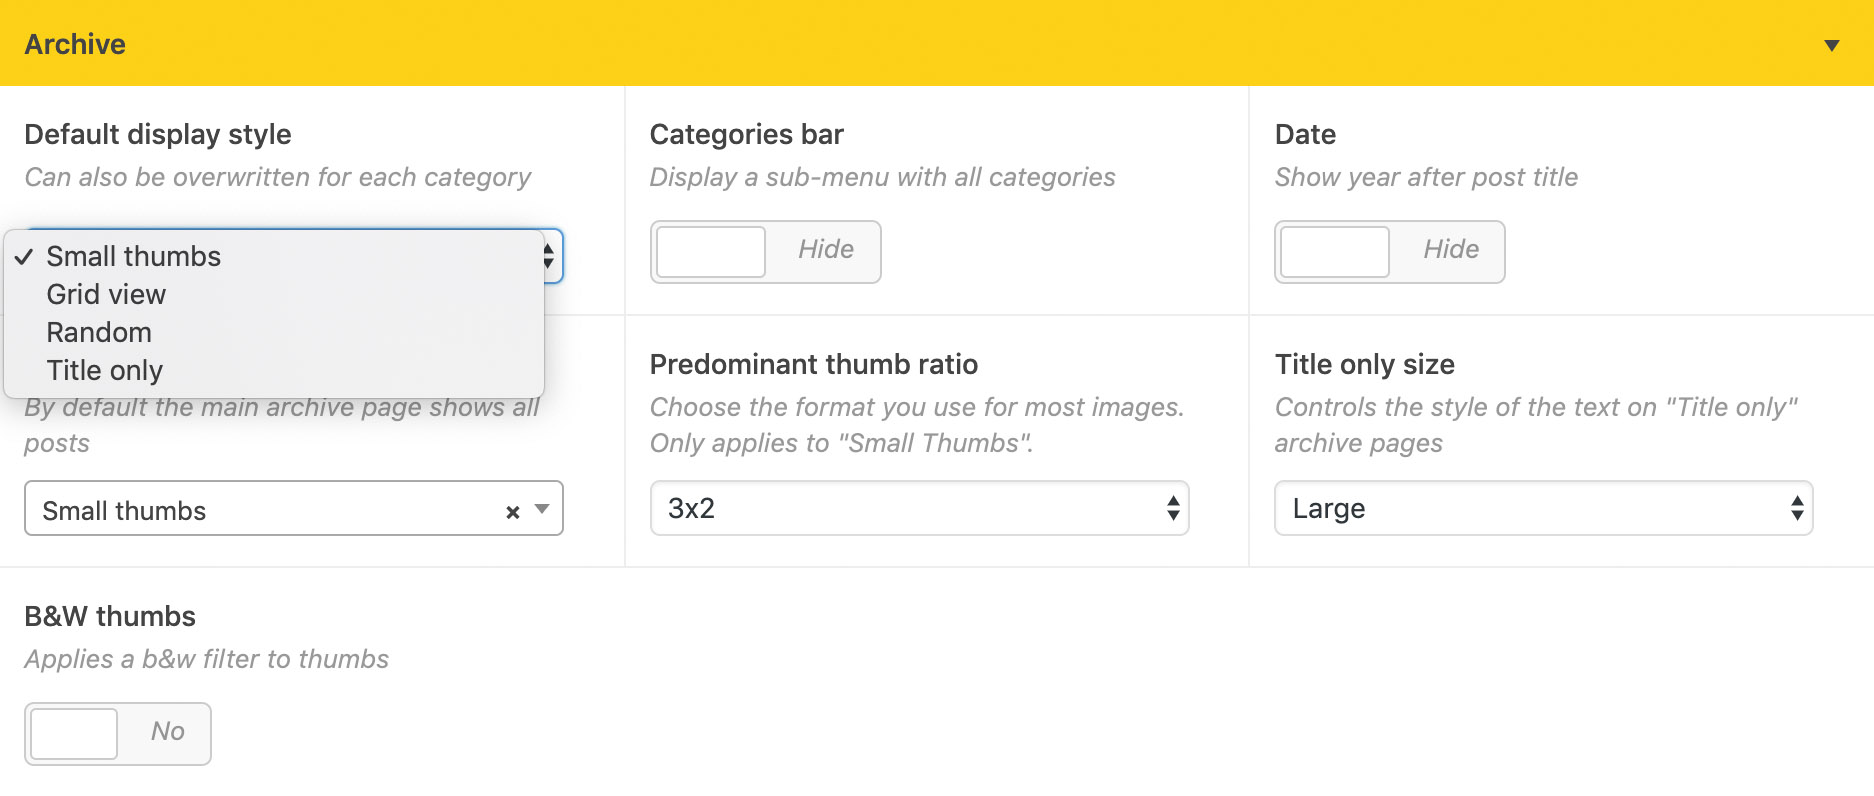
Default display style
Invisible supports 4 different styles to display archive pages:
Small thumbs - all images in a post are displayed. This is the default view, offering a quick glance at your entire body of work. It was the original inspiration for the theme.
Grid view - every post is represented by one image of the same size, which can be chosen using the Featured Image in the right sidebar of the post admin screen. The thumbnails have a default 3:2 ratio. If you want to change this, go under Settings → Media and update the Thumbnail Height to obtain the desired aspect ratio. Note that any already uploaded images will not automatically update, but you can use a plugin such as Simple Image Sizes to quickly regenerate them.
Random - also one image per post, but here the image is bigger, match the aspect of the original image and the size and placement are programatically randomised. The page will look slightly different on every load.
Title only - only the title of the each post is shown using a larger font size, with the featured image displayed in the bottom right corner of the screen on hover.
The Archive display style can be set globally in the Invisible Folio options page, but can also be changed on a per-category basis under Posts → Categories. This would allow you to either have different display options for different folios of work, or use the categories as alternative views for your work, similarly to our demo site (e.g. Thumbs / List View).
Categories bar
If using categories, you can toggle the display of the secondary nav bar here. The categories bar is hidden by default. You can also choose how the bar is styled, either using the Navigation separator option or choosing a custom background under Colors.
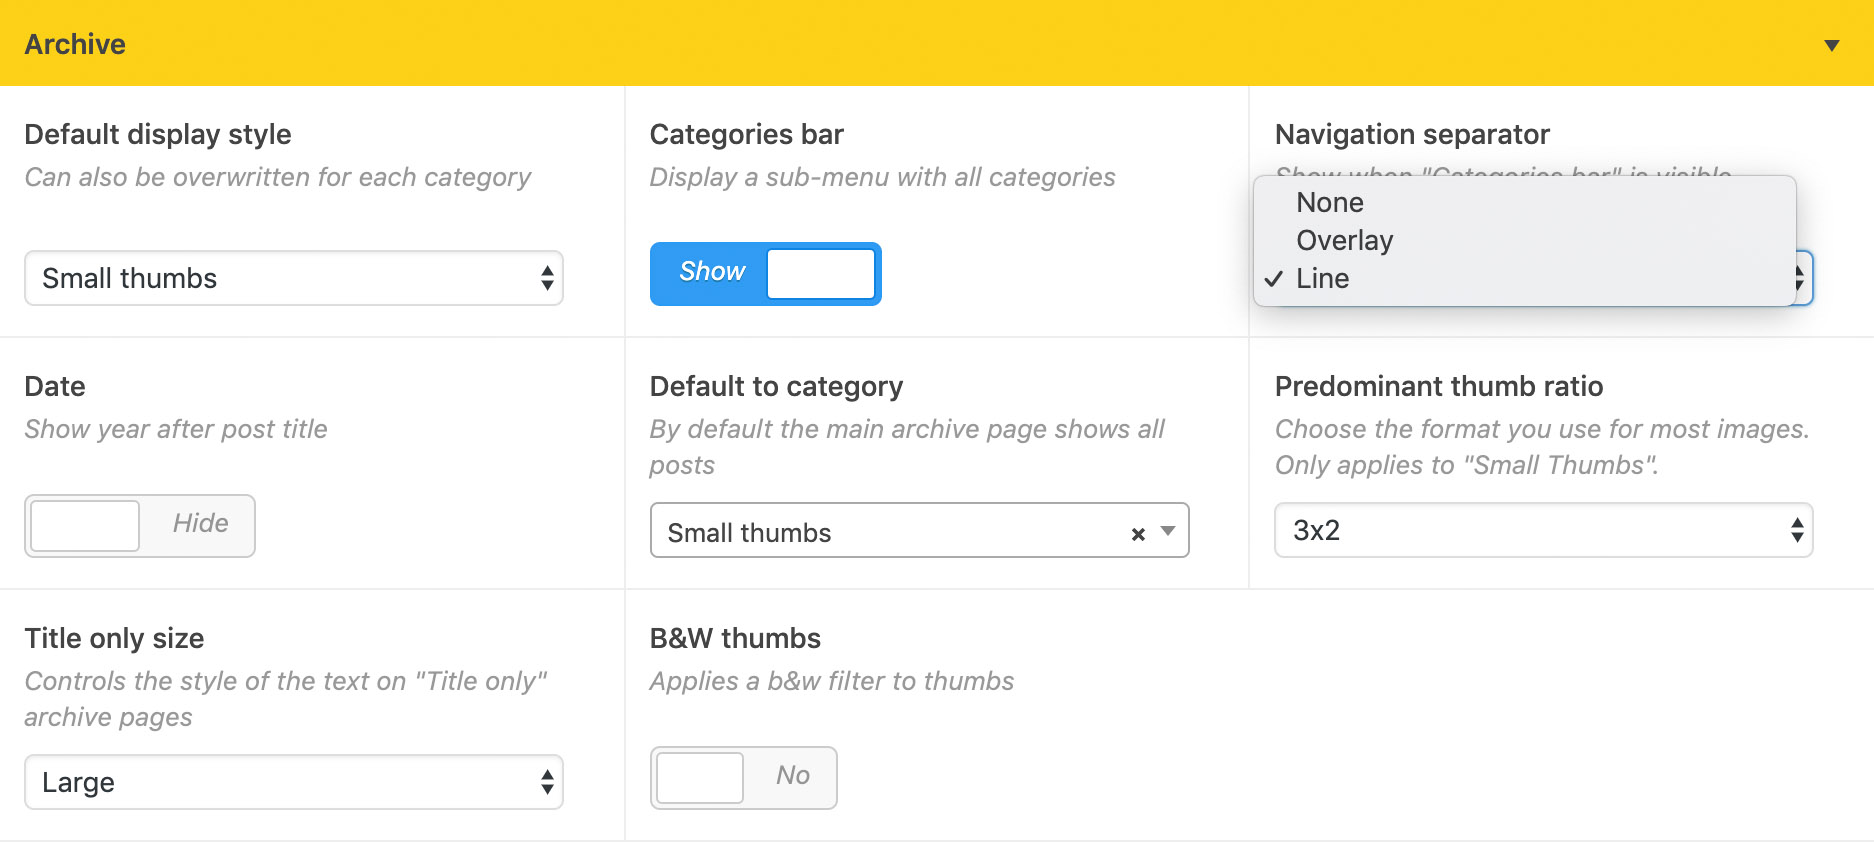
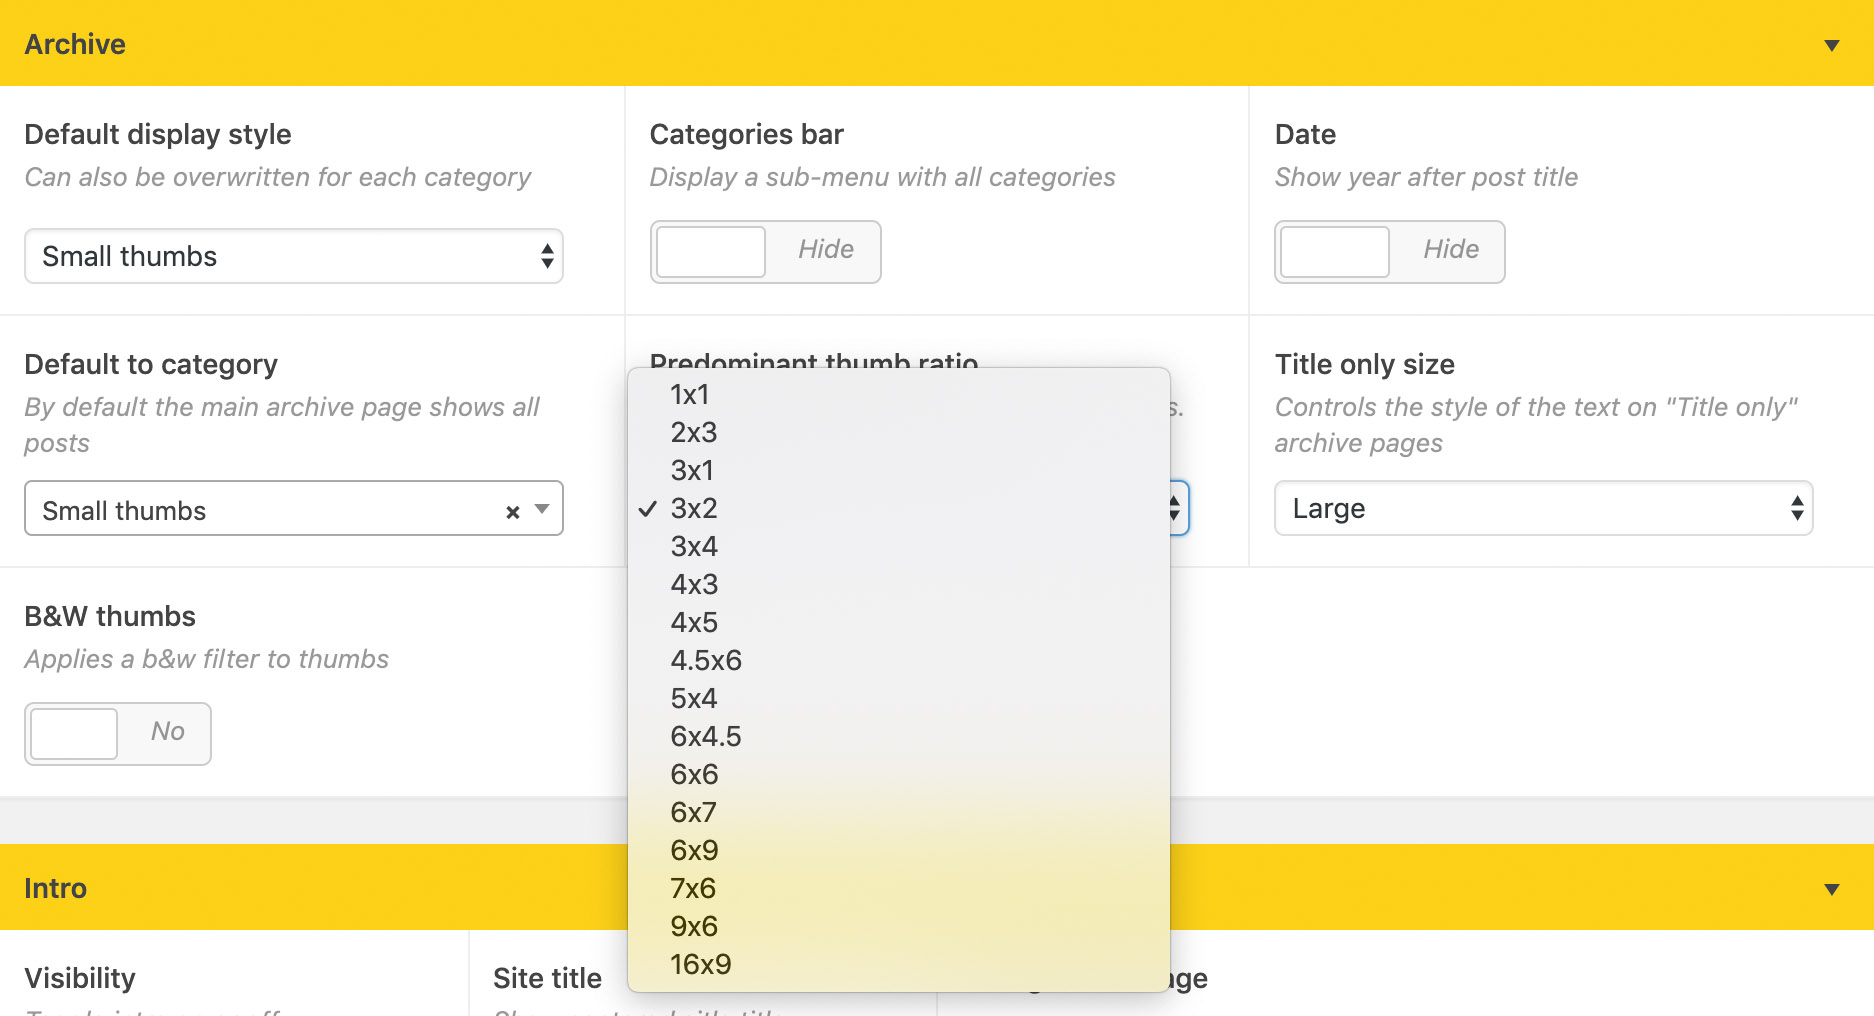
Predominant thumb ratio
The Archive display style can be set globally in the theme options page, but can also be changed on a per-category basis under Posts → Categories. This would allow you to either have different display options for different folios of work, or use the categories as alternative views for your work, similarly to our demo site (e.g. Thumbs / List View).
Default to category
By default, Invisible shows all Posts on the main archive page and includes an All link in the categories bar. If you want to hide this, you can choose a specific category to use as the default view.
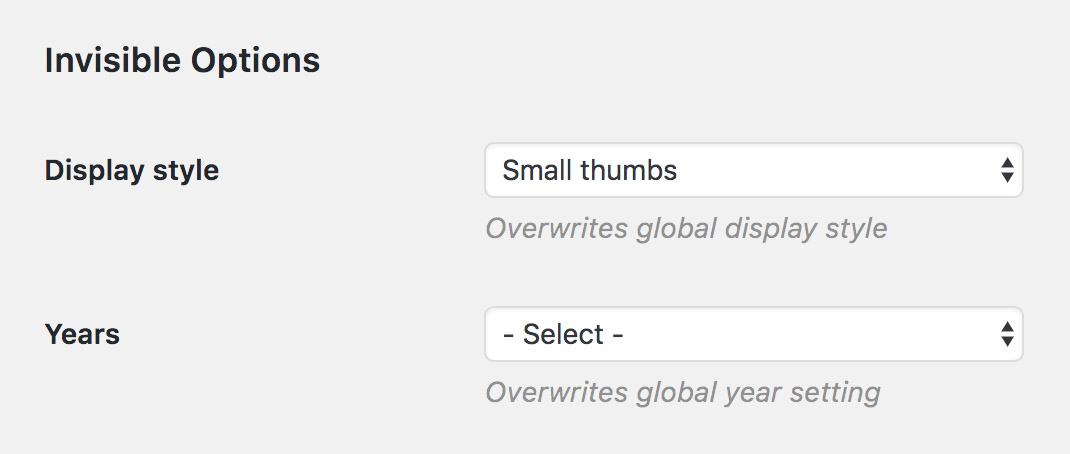
Years
Allows you to display the year/s a project was created. This is shown after the title and can be changed either by modifying the Published time (top right side of the Post edit screen) or via the Custom year/s field in the Invisible Options section of the Post edit screen.
Ordering
Invisible ignores the default date-based ordering for Posts and uses custom sorting, similar to the standard Pages behaviour. To reorder entries, either manually change the Order page attribute in the Post admin screen, or install the recommended Simple Custom Post Order plugin to enable straightforward sorting via drag&drop (why this is not still part of WP core remains a mystery).
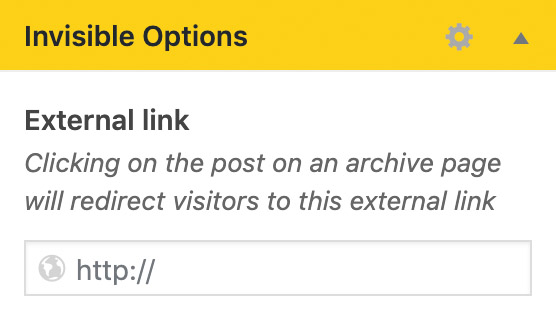
External links
You can also use a Post as a placeholder and simply use it to link to an external page. This can be done by filling the following field in the post admin screen.
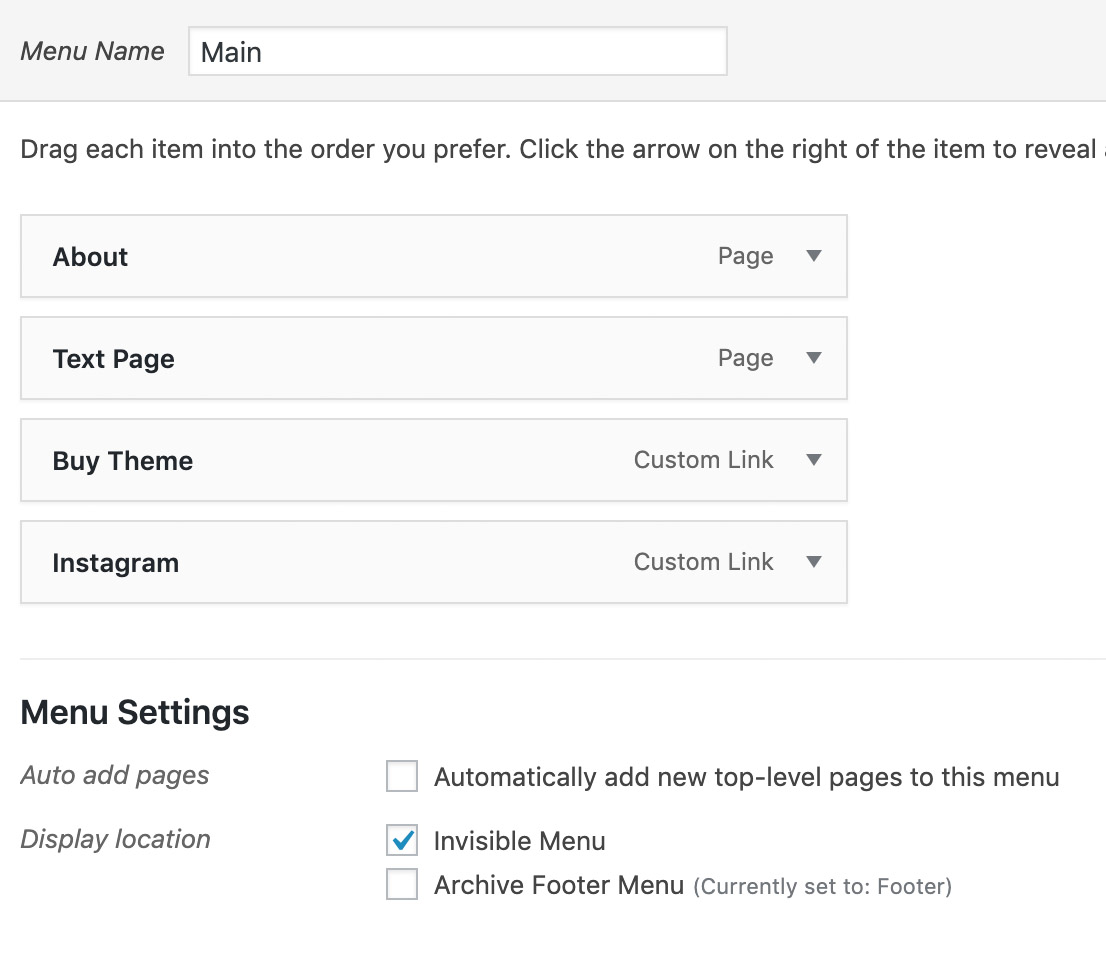
Menus
By default, Pages will be shown in the top right of the main menu bar, with the static home and archive pages automatically excluded.
If you want more control, you can also create a custom menu under Appearance → Menus, which will replace the default page list. The menu should be saved under the Invisible Menu location.
A secondary Archive Footer Menu location can be used to display a menu at the bottom of archive pages, useful if you want to display a copyright notice, link to a terms & conditions page, etc.
If you need to exclude a link from the theme's AJAX loading mechanism, you can do so by adding a no-ajax class to that menu item.
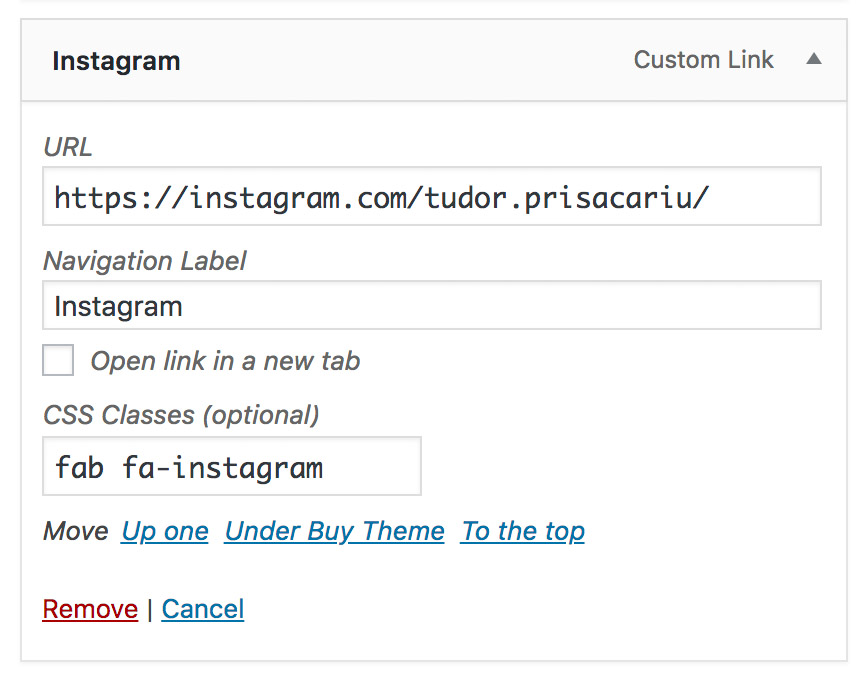
If you need to create a text-only item (no link), create a "Custom Link" and use # as the URL, Invisible will automatically disable the pointer cursor.
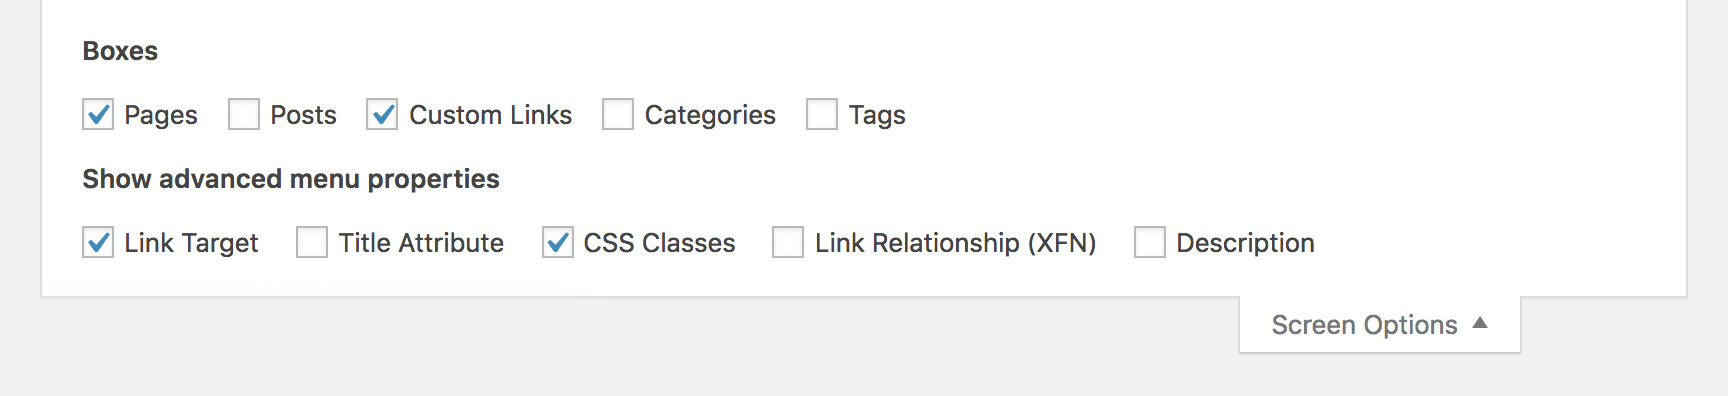
Besides Pages, the menu can also include custom links. Social icons are supported via the Font Awesome Brands set. Click on Screen Options button on the top right on the Menus page and select the CSS Classes checkbox. Add the fab class together with the class corresponding to the required icon (check the FA link above for reference).
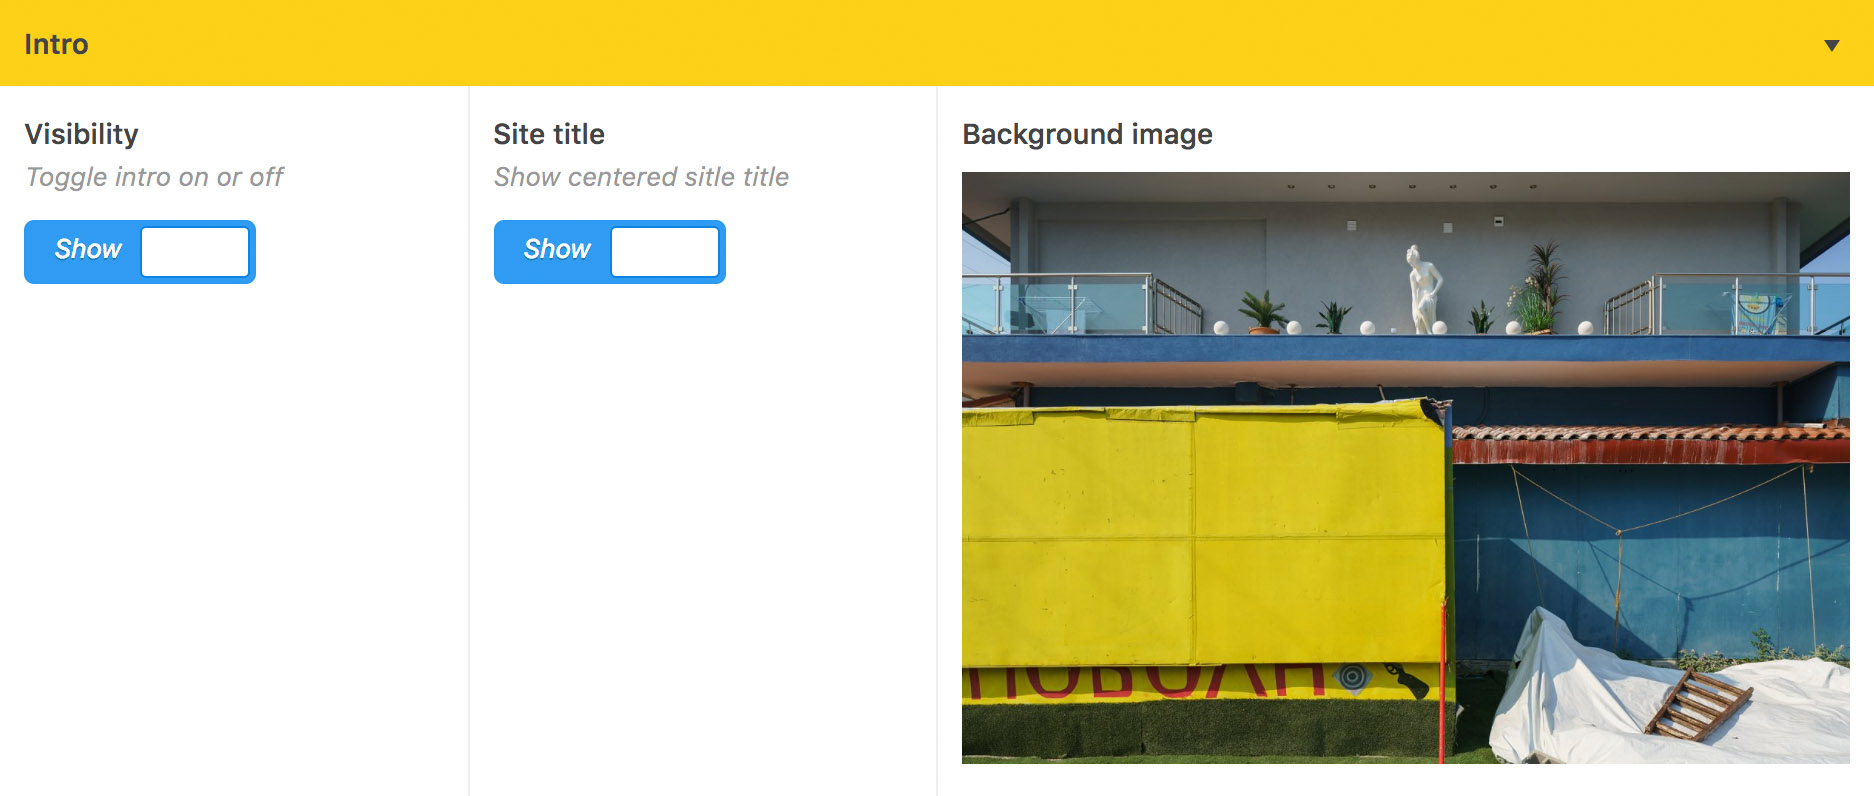
Intro
The intro slide is shown when first loading the site and automatically hides without requiring user interaction. You can opt for having a background image for it and show/hide the centered slide title.
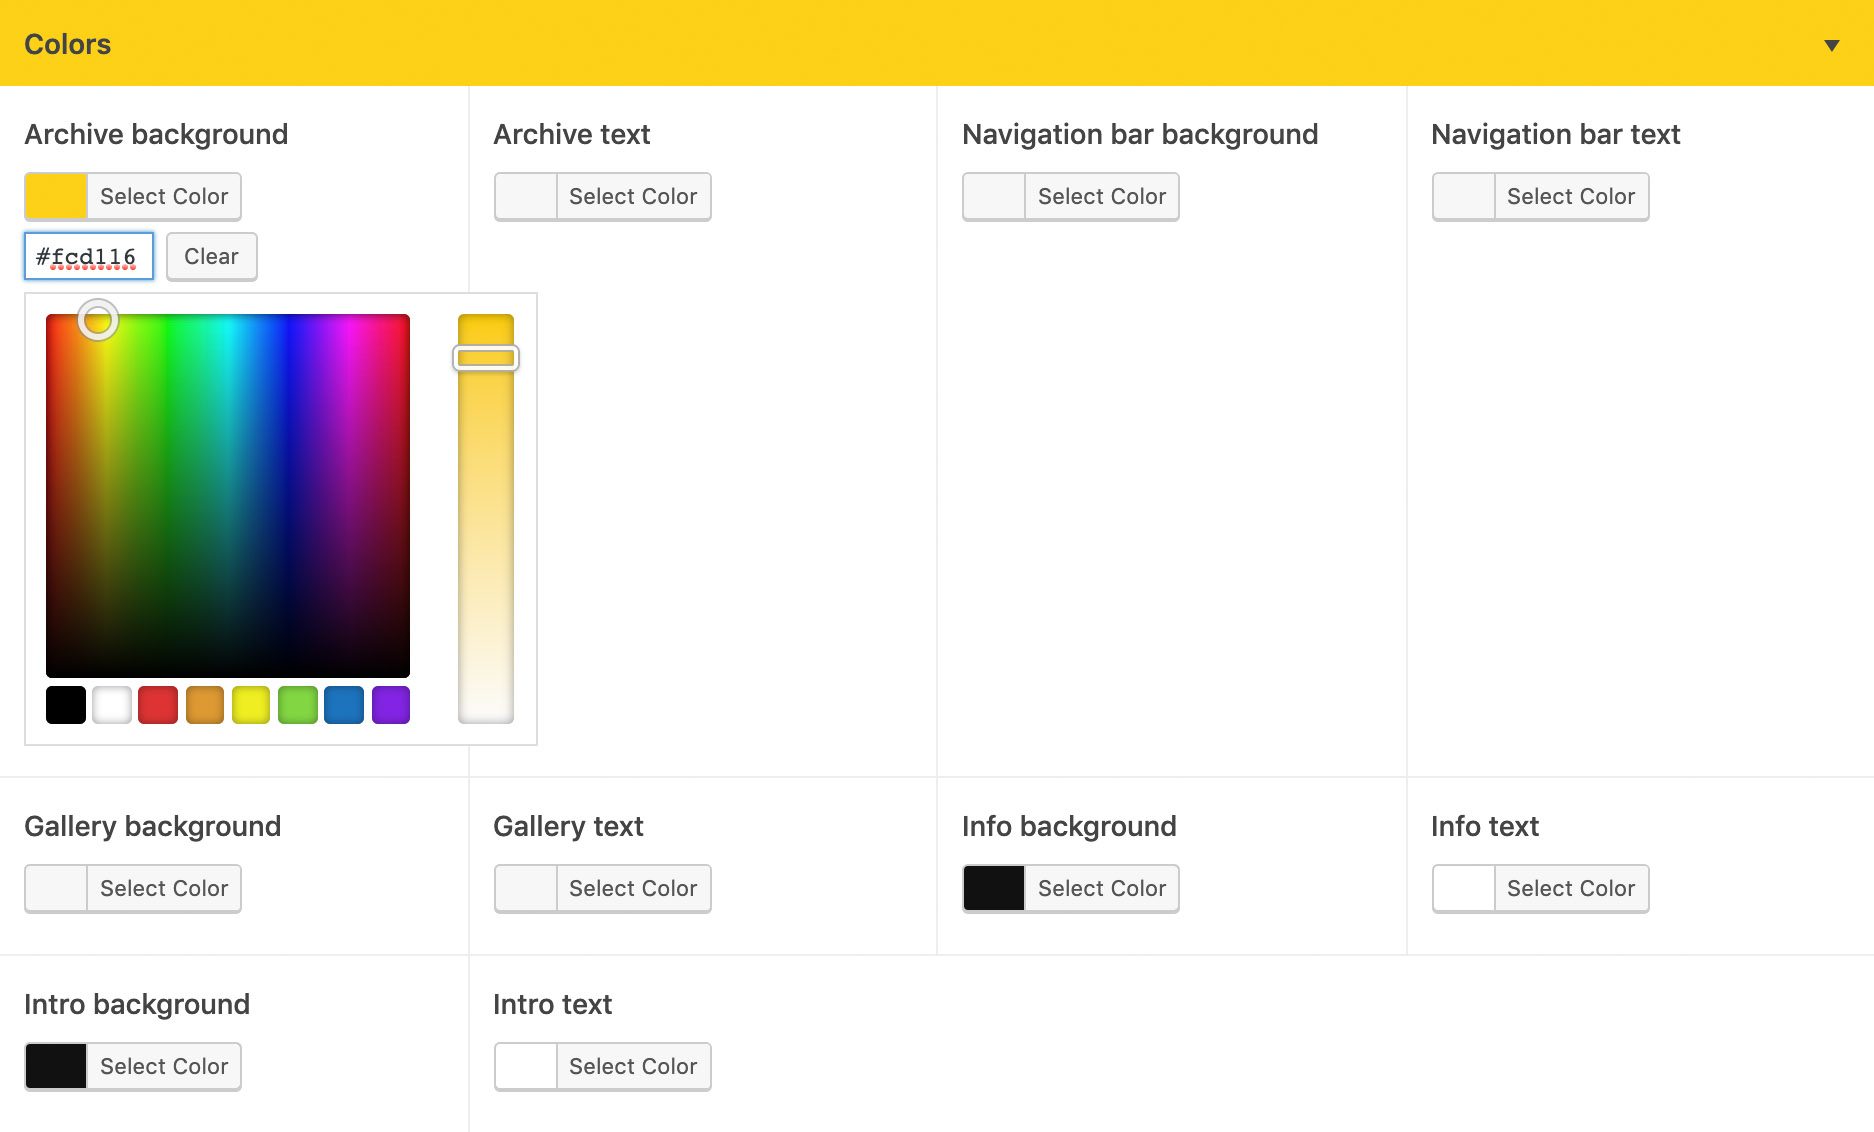
Colors
Different text / background color combinations can be chosen for archives pages, galleries, text panel and intro. For posts, these can also be controlled independently, allowing you, if appropriate, to create a unique look for each gallery.
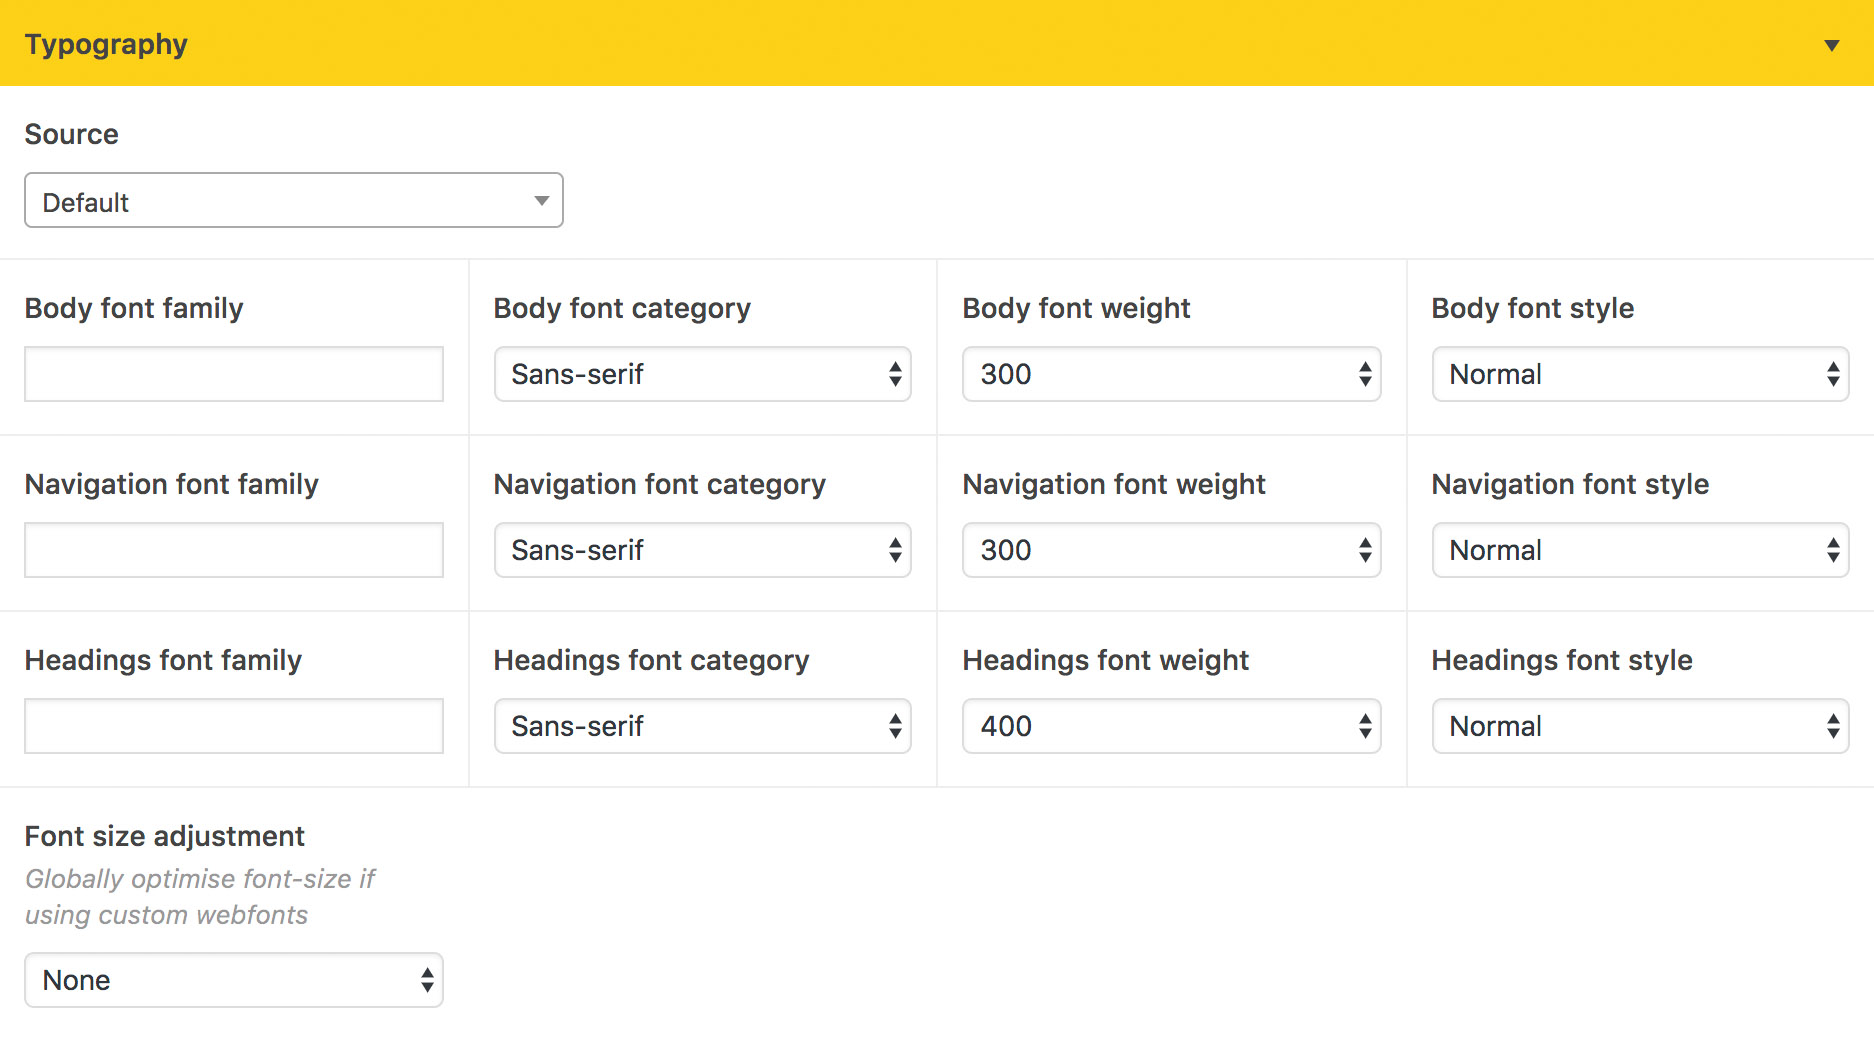
Typography
By default, Invisible is set in San Francisco on macOS/iOS and Rubik elsewhere. If you prefer serifs, simply switch the font category options to Serif, in which case the default will be Playfair Display.

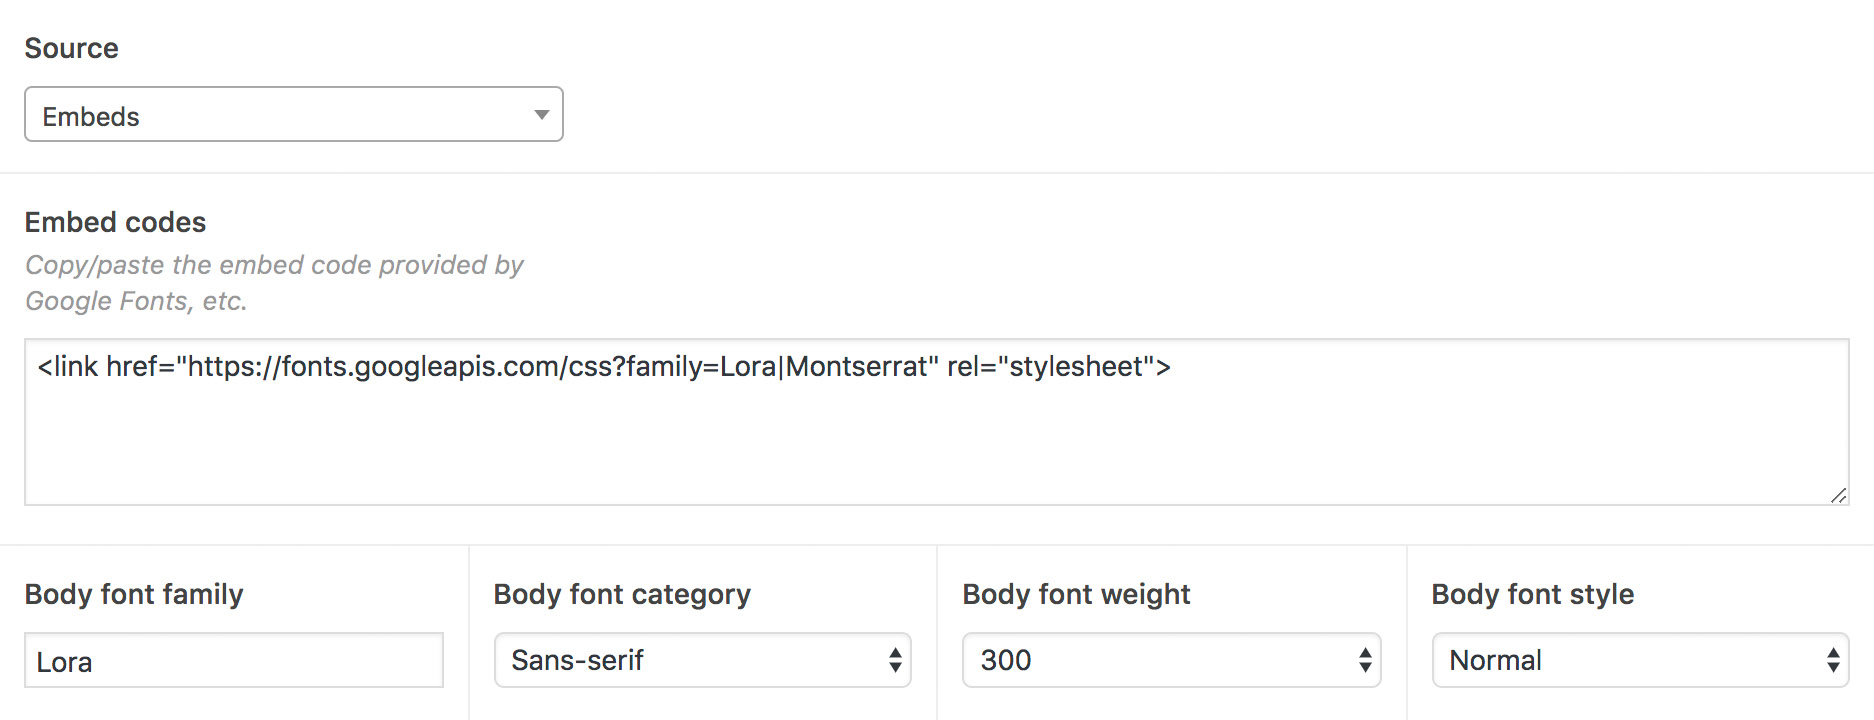
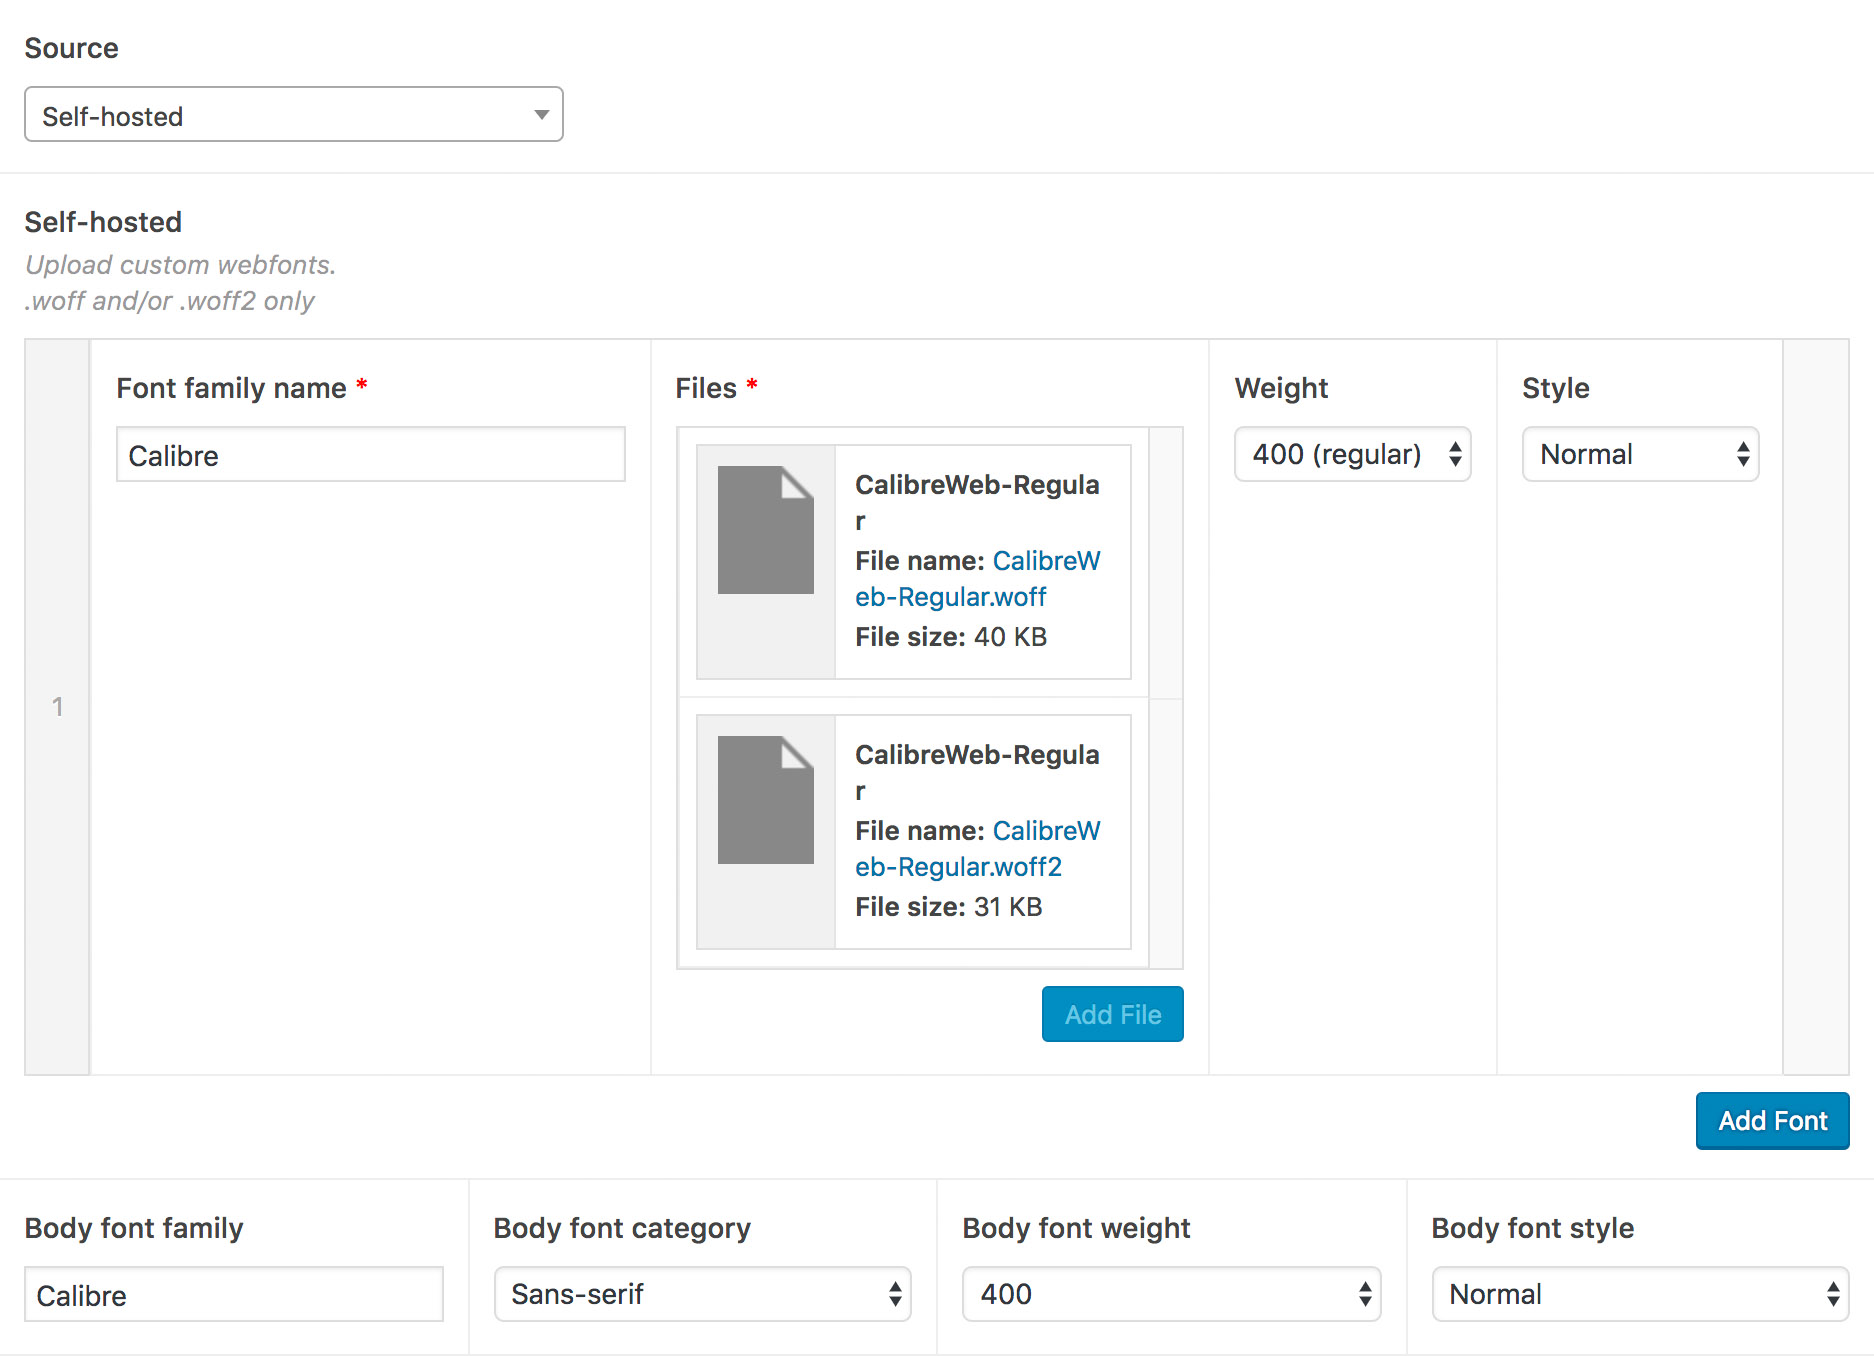
If you want a more unique look, you can either link to embedded fonts from services such as Google Fonts, or upload custom webfonts purchased elsewhere (we suggest looking at foundries such as Grilli Type, Klim or Colophon).
Font options
The body copy, navigation and heading font styles can be controlled separately, enabling you to mix & match looks.
Embeds
For embeds, copy-paste the supplied link/script tag and specify the font family name, category, weight and style for each of the three different sections.
Webfonts
For webfonts, upload .woff and .woff2 files (both if available, .woff is the most widely supported) and specify a family name, weight and style.
Tweaking font sizes
When using custom typography, you can use this settings to proportionally grow / shrink all font sizes to better match the Invisible design.
Logo & Icons
If you prefer to replace the site title in the top left of the menu bar with a customised logo, you can do so here.
You can also replace the default yellow dot favicon and mobile device icons.

Search / Sharing
Invisible automatically adds a meta description tag and Facebook / Twitter share tags for the Homepage and single Posts / Pages.
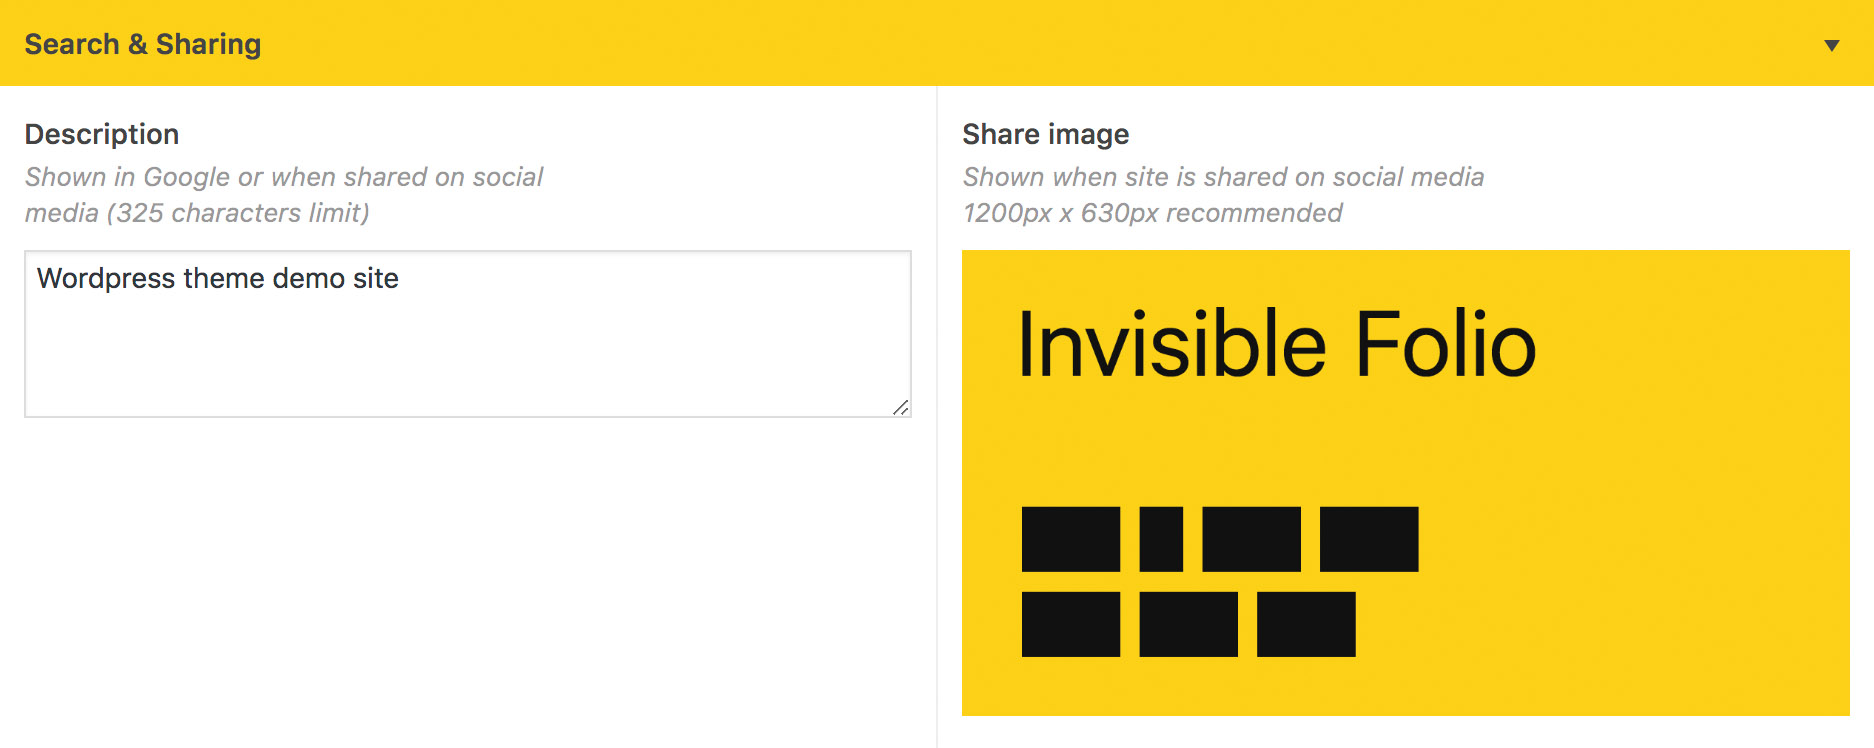
For the homepage the theme will first look for the custom text set in this section, if there isn't one it will display the tagline set in Settings → General → Site Title and will eventually fallback to the first 325 characters of the description text. If no default share image is set, the featured image will be used.
For a Post / Page, the first 325 characters of the description text will be used. The featured image will be used first, if it doesn't exist the default share image will be displayed.
If you want to have even more control over SEO, we recommend installing Yoast SEO. Please note the theme won't add any meta tags if Yoast SEO is installed.
Tracking
If you want to keep track of your website's visitors, sign up for a Google Analytics account and enter the tracking ID here.

Child Themes
If you want to add any custom CSS or make other modifications without changing the theme code, you can do so either via a plugin such as Simple Custom CSS and JS or by using a child theme. Here is a blank Invisible Child Theme you can use.